In this tutorial we will look at how to set up a site to site VPN between a pfSense server and a Mikrotik client using OpenVPN the proper way. We’ll be taking advantage of pfSenses superb certificate management features to do SSL/TLS instead of just a pre-shared key.
Our client will be a Routerboard RB2011 detailed in a earlier post that connects to a pfSense server. Only the local networks will be shared between the two sites, sharing the external address of the server with the client is out of scope of this tutorial. In my scenario the client’s local network will be 192.168.11.0/24 and the server’s 192.168.0.0/24. Out encryption will be AES with a key size of 256bit (the maximum that RouterOS supports on this router as of now).
Let’s first connect to our router and set up the bare minimum. If you don’t know how to do that please refer to this tutorial to get you started. After we connect via winbox go to Quick Set:
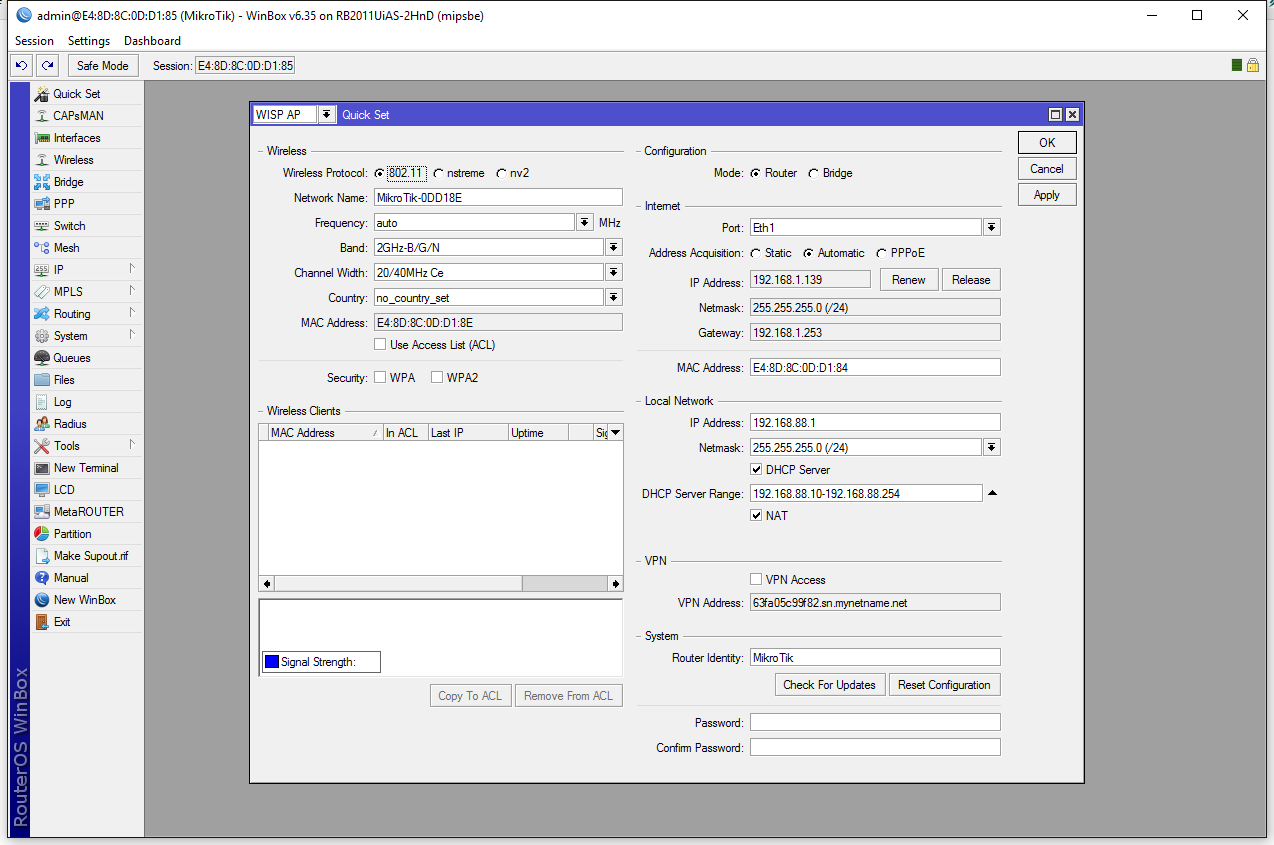
And change the defaults to suit our needs:
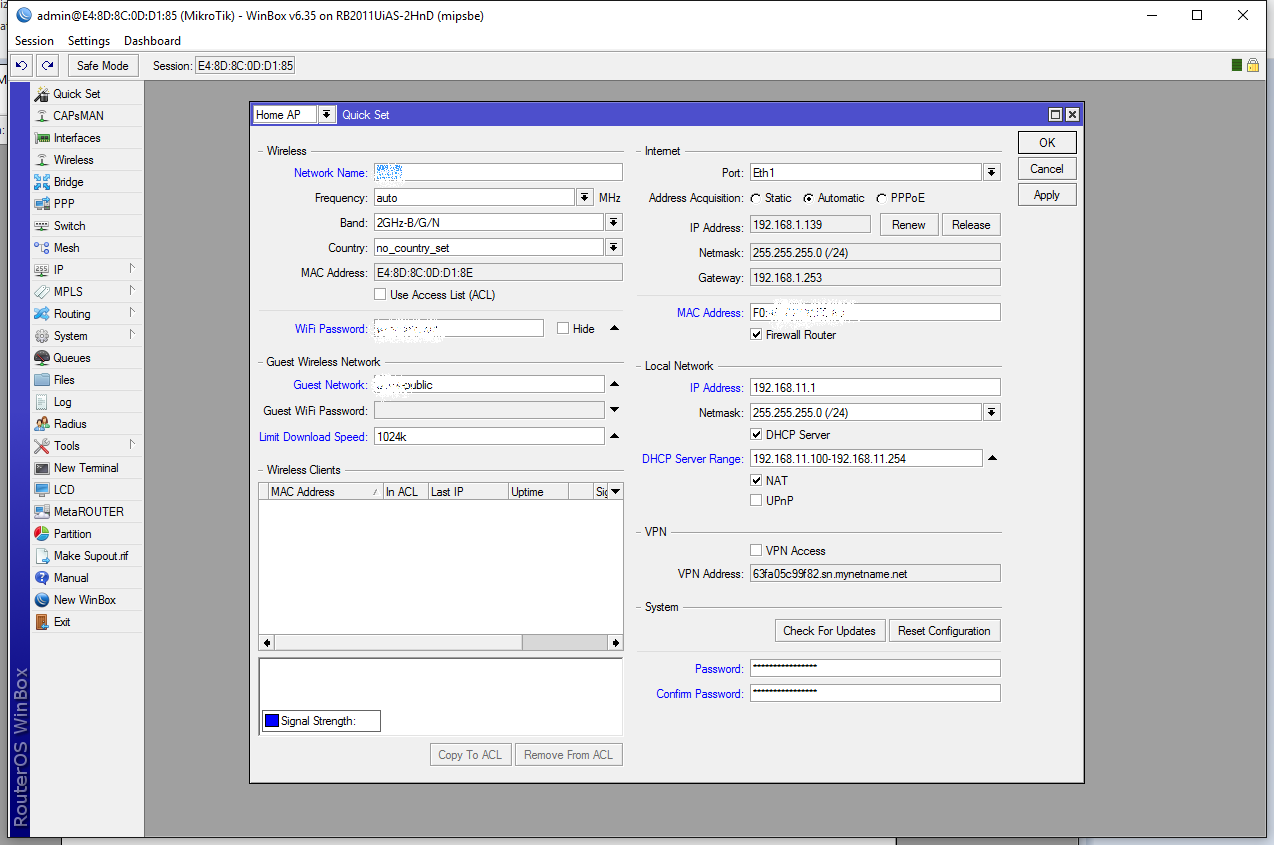
Of course after applying the settings it will disconnect because of the network change:

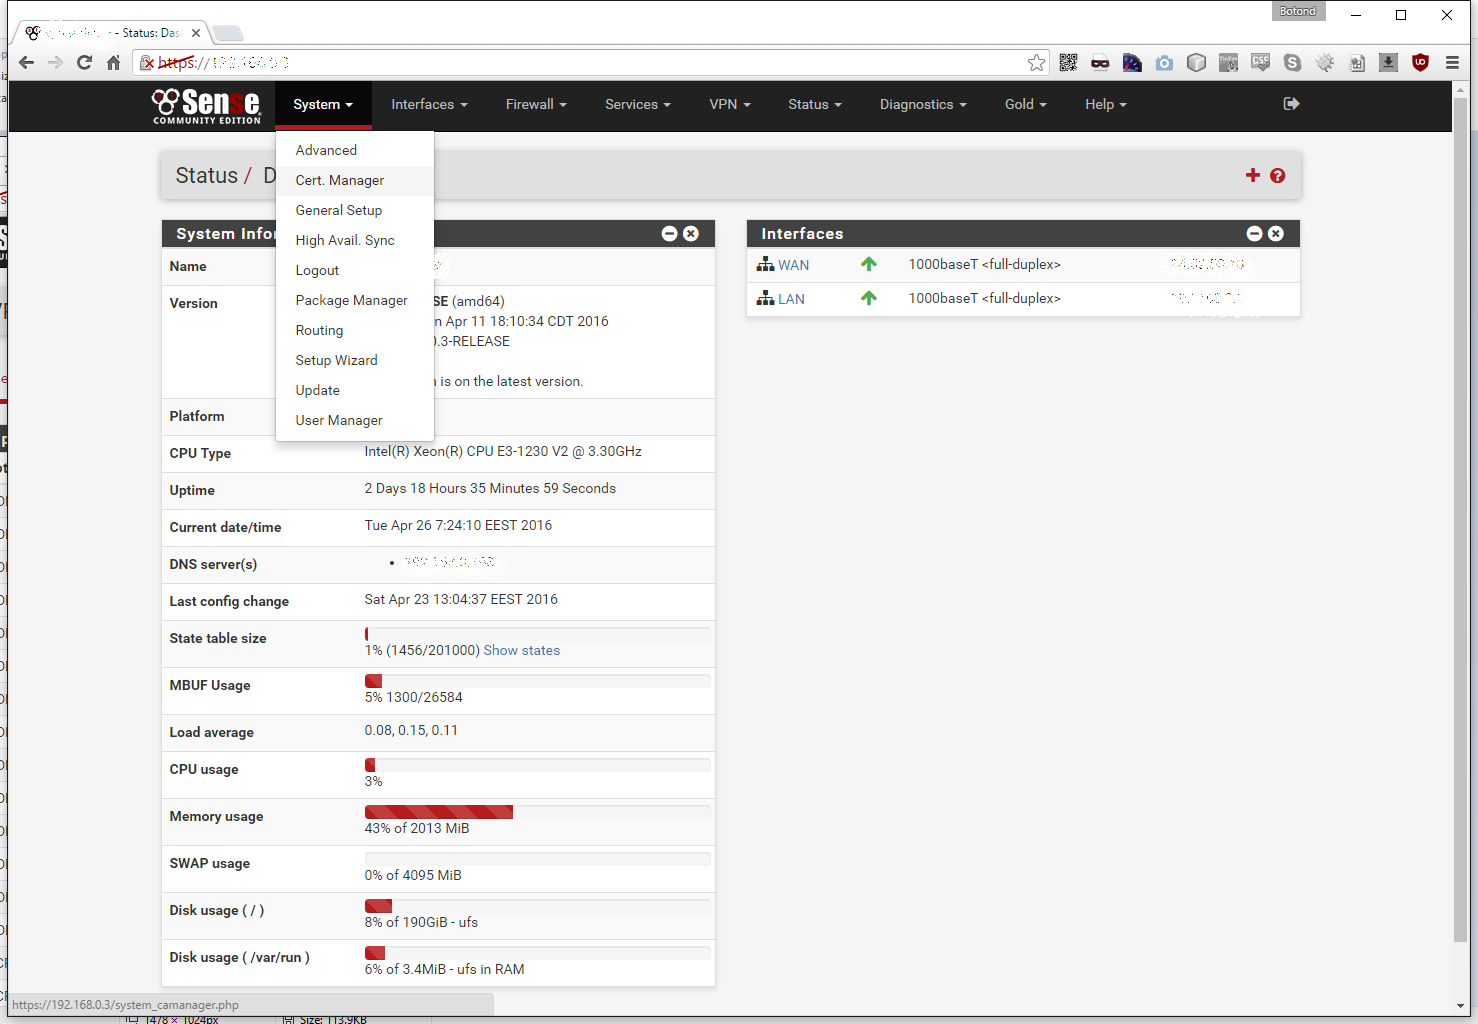
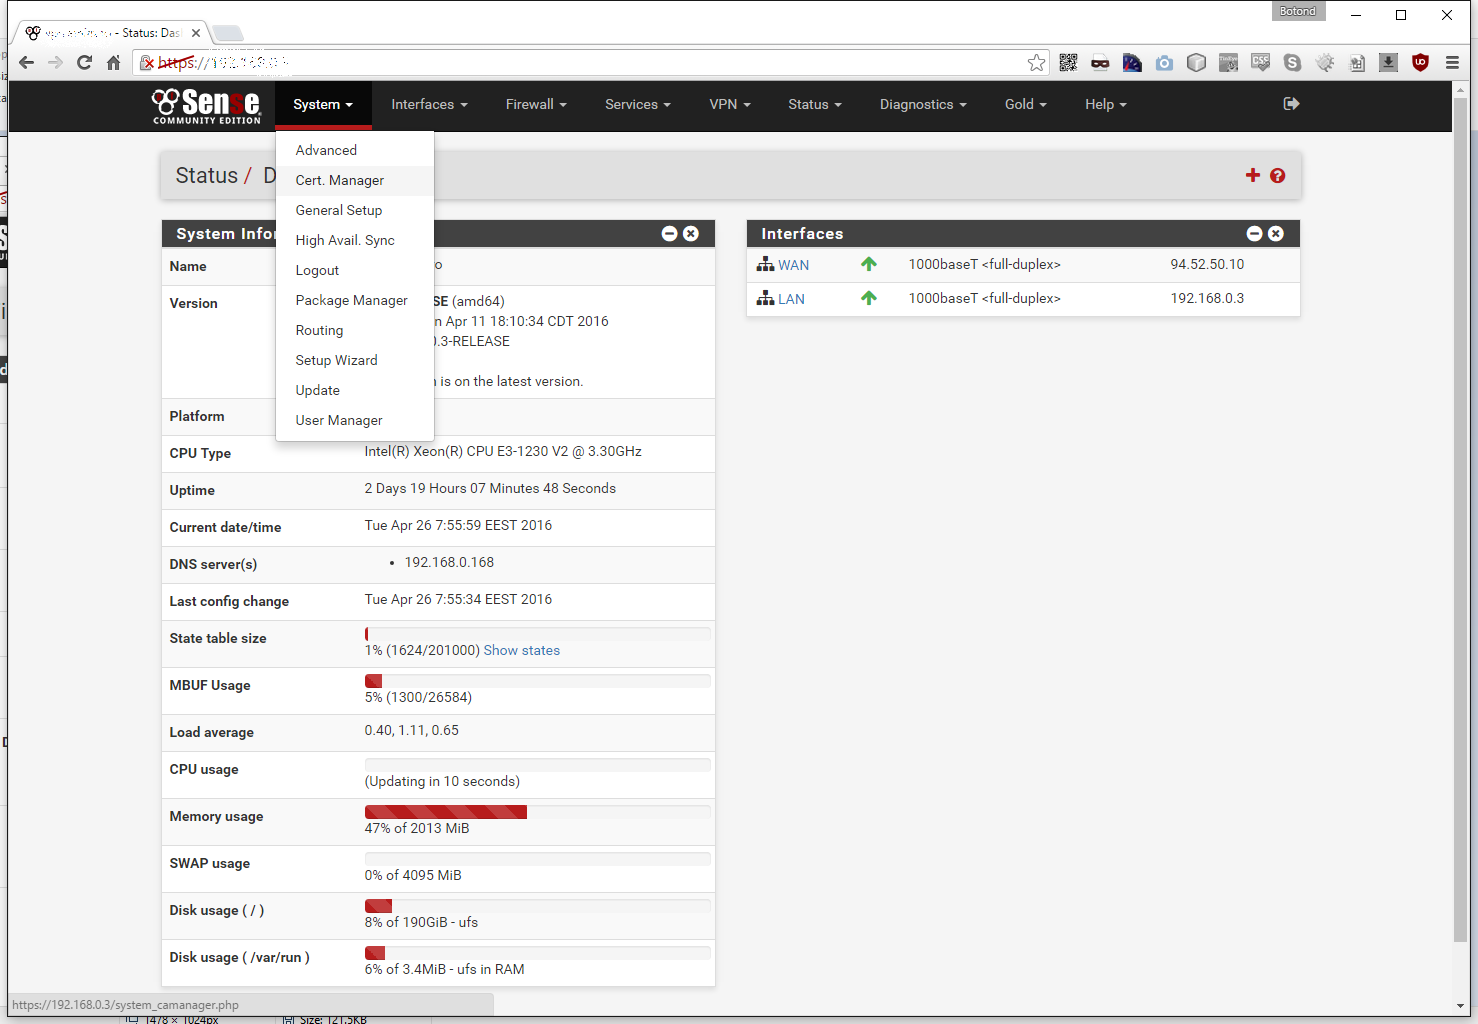
Now to the server side of things. Log in to pfSense and go to System -> Cert. Manager:
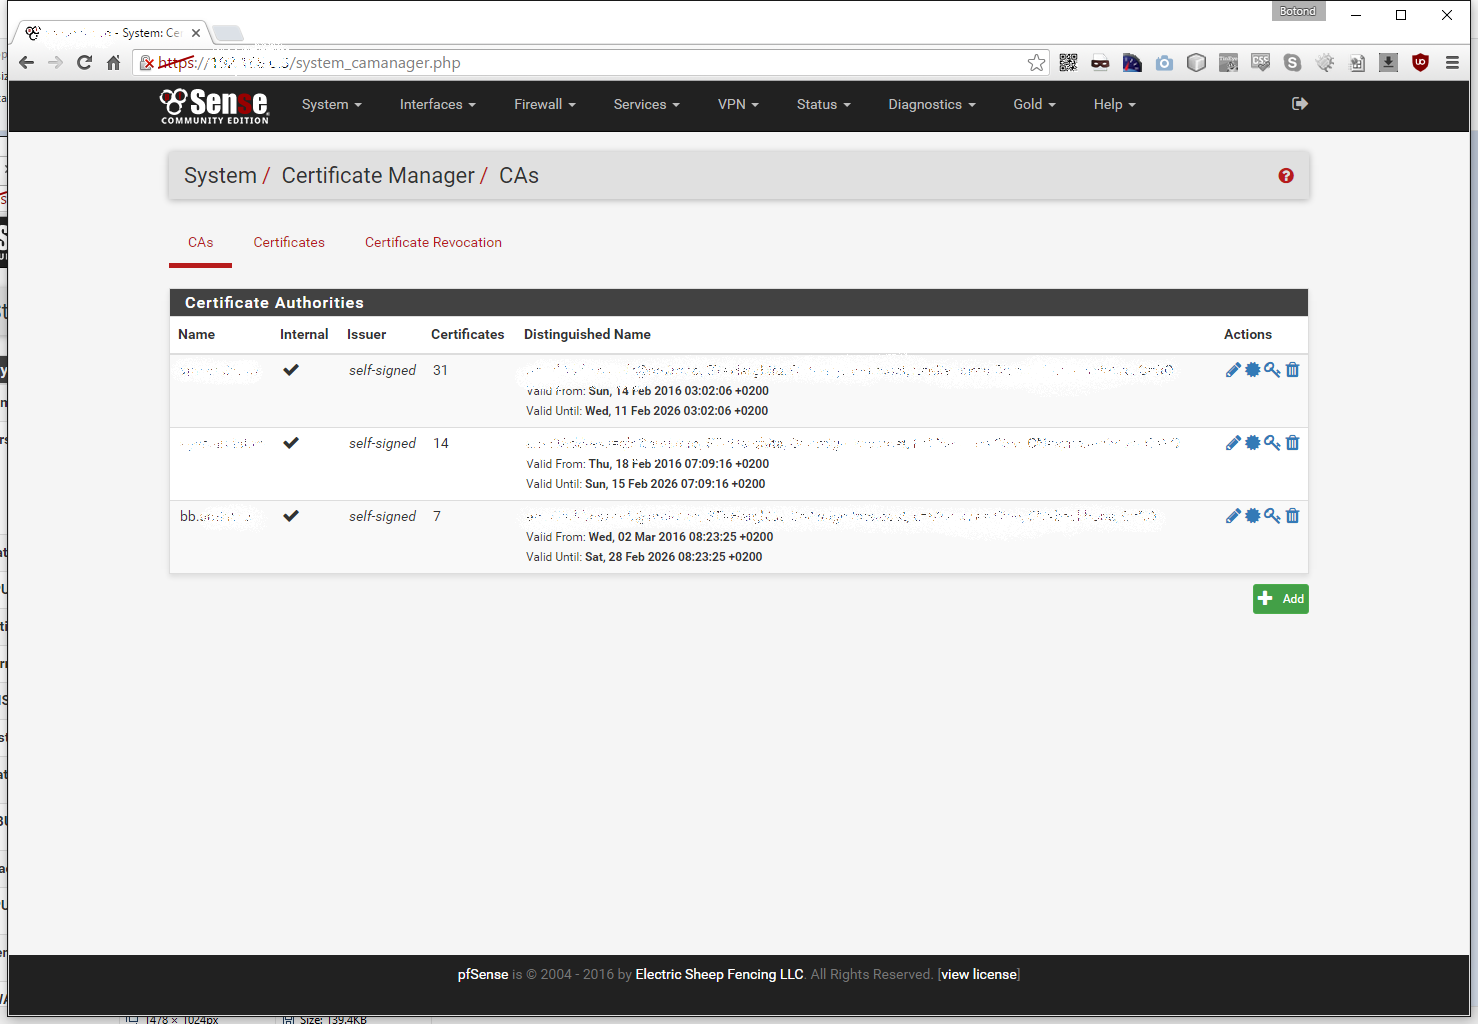
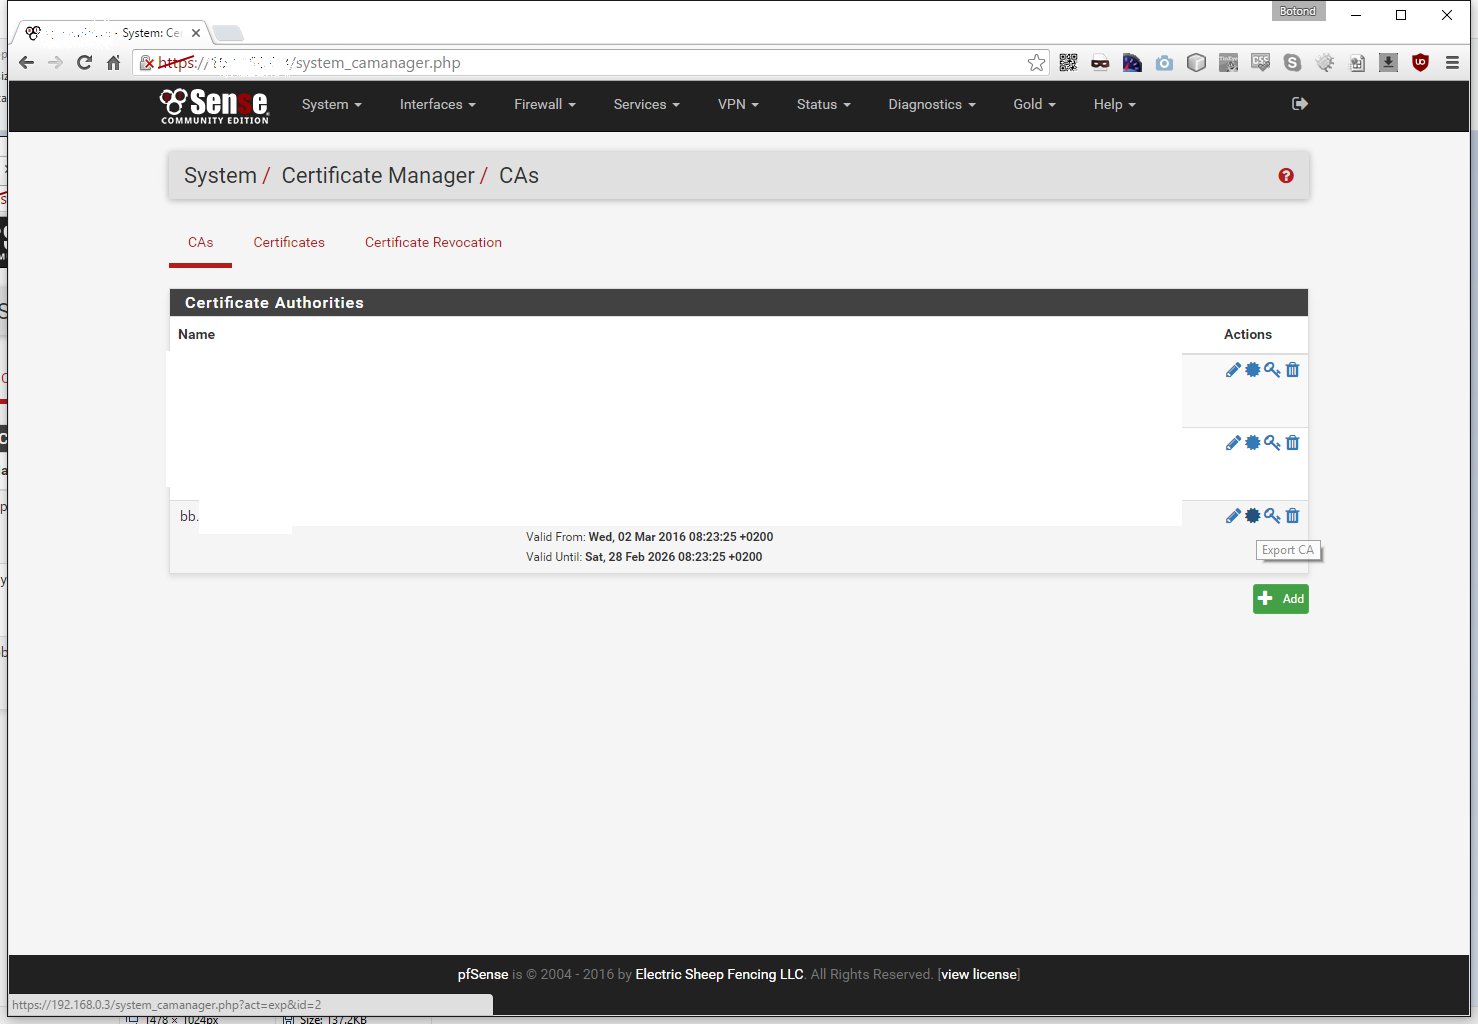
The Certificate Manager screen will default to the CAs, where u can see your Certificate Authorities. If you don’t already have a dedicated CA for site to site VPNs than I highly suggest setting up one here. In my case we will be using the one that starts with bb (it stands for Back-Bone):
Navigating to Certificates we will see our certificates. At the very least there will be the webConfigurator present:
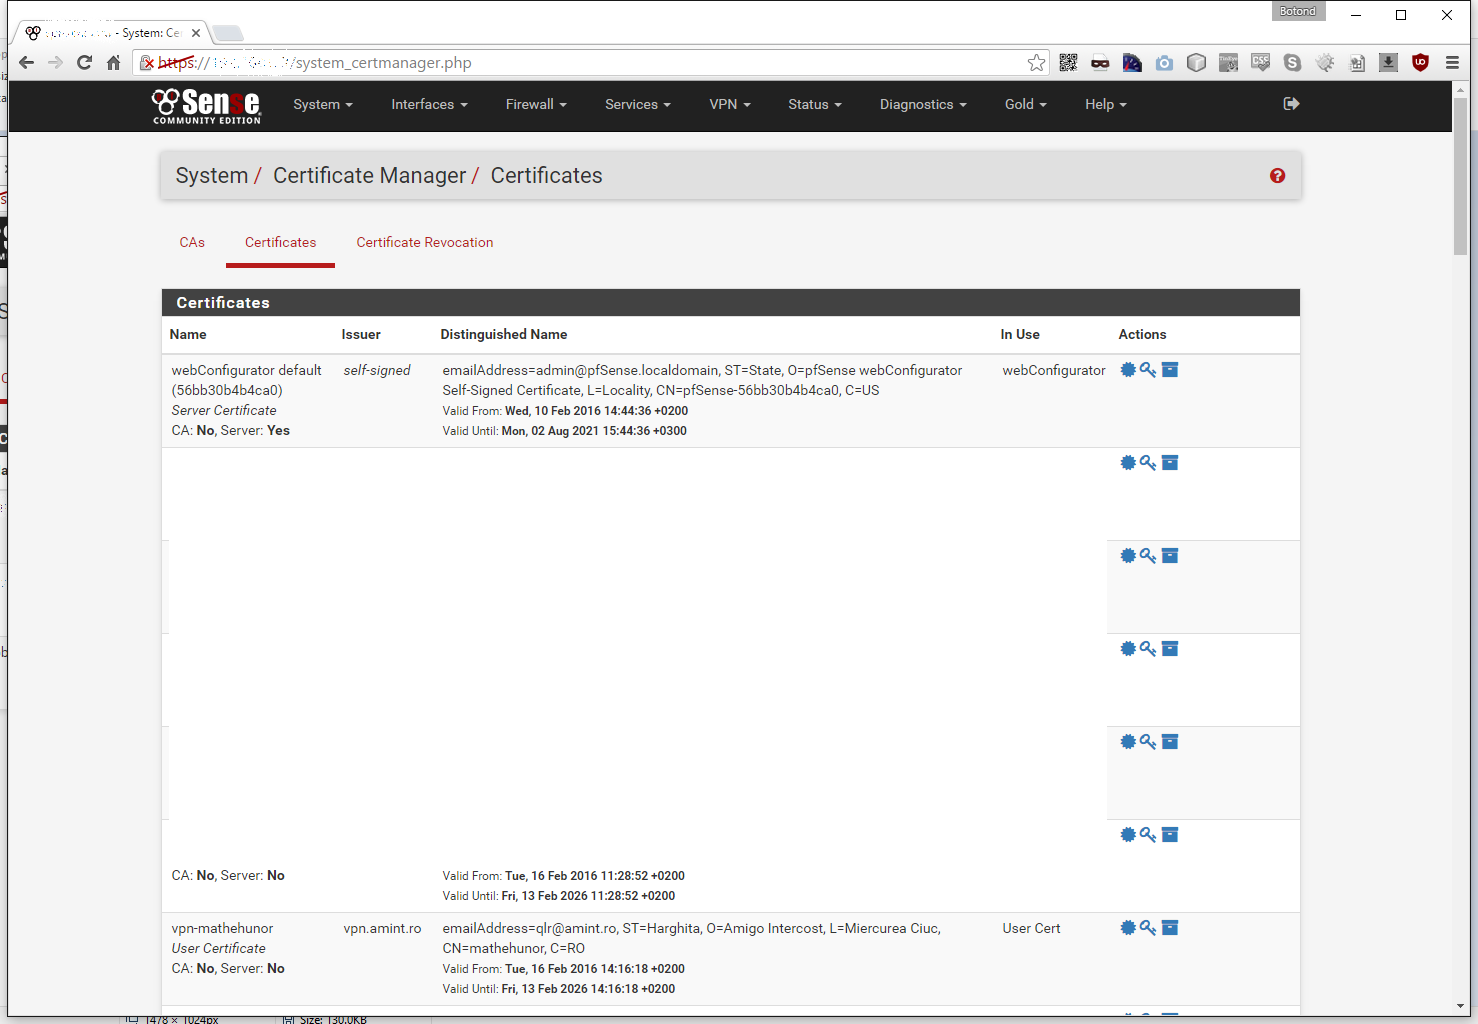
In my case I have a lot, so i scroll to the bottom to Add a new one:

The Add a New Certificate screen will appear:
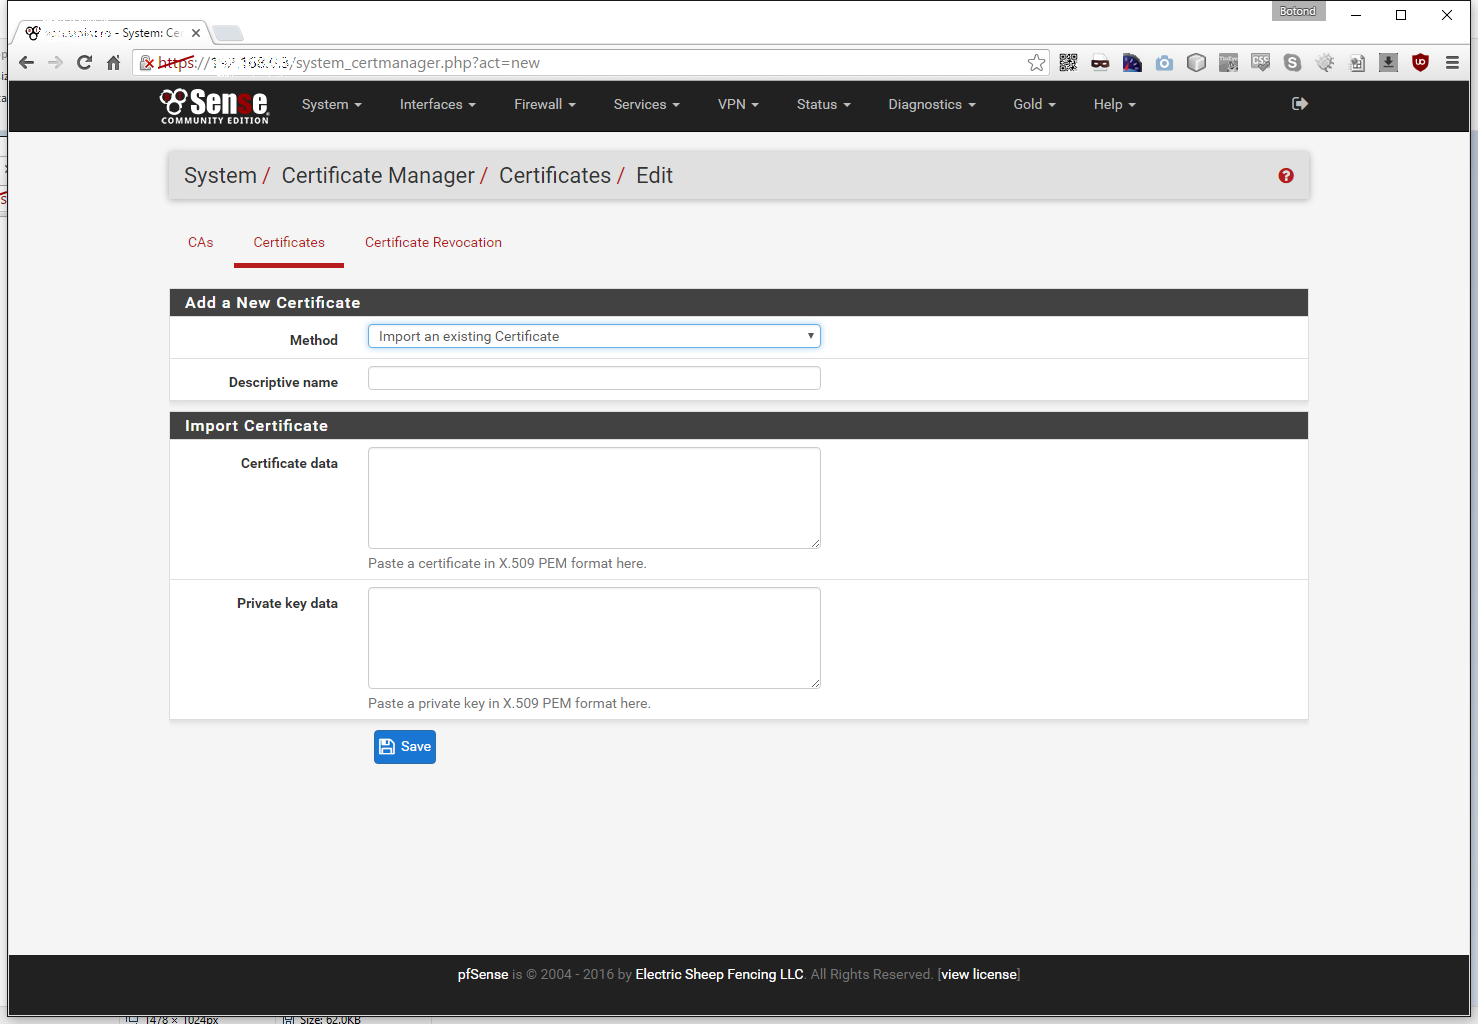
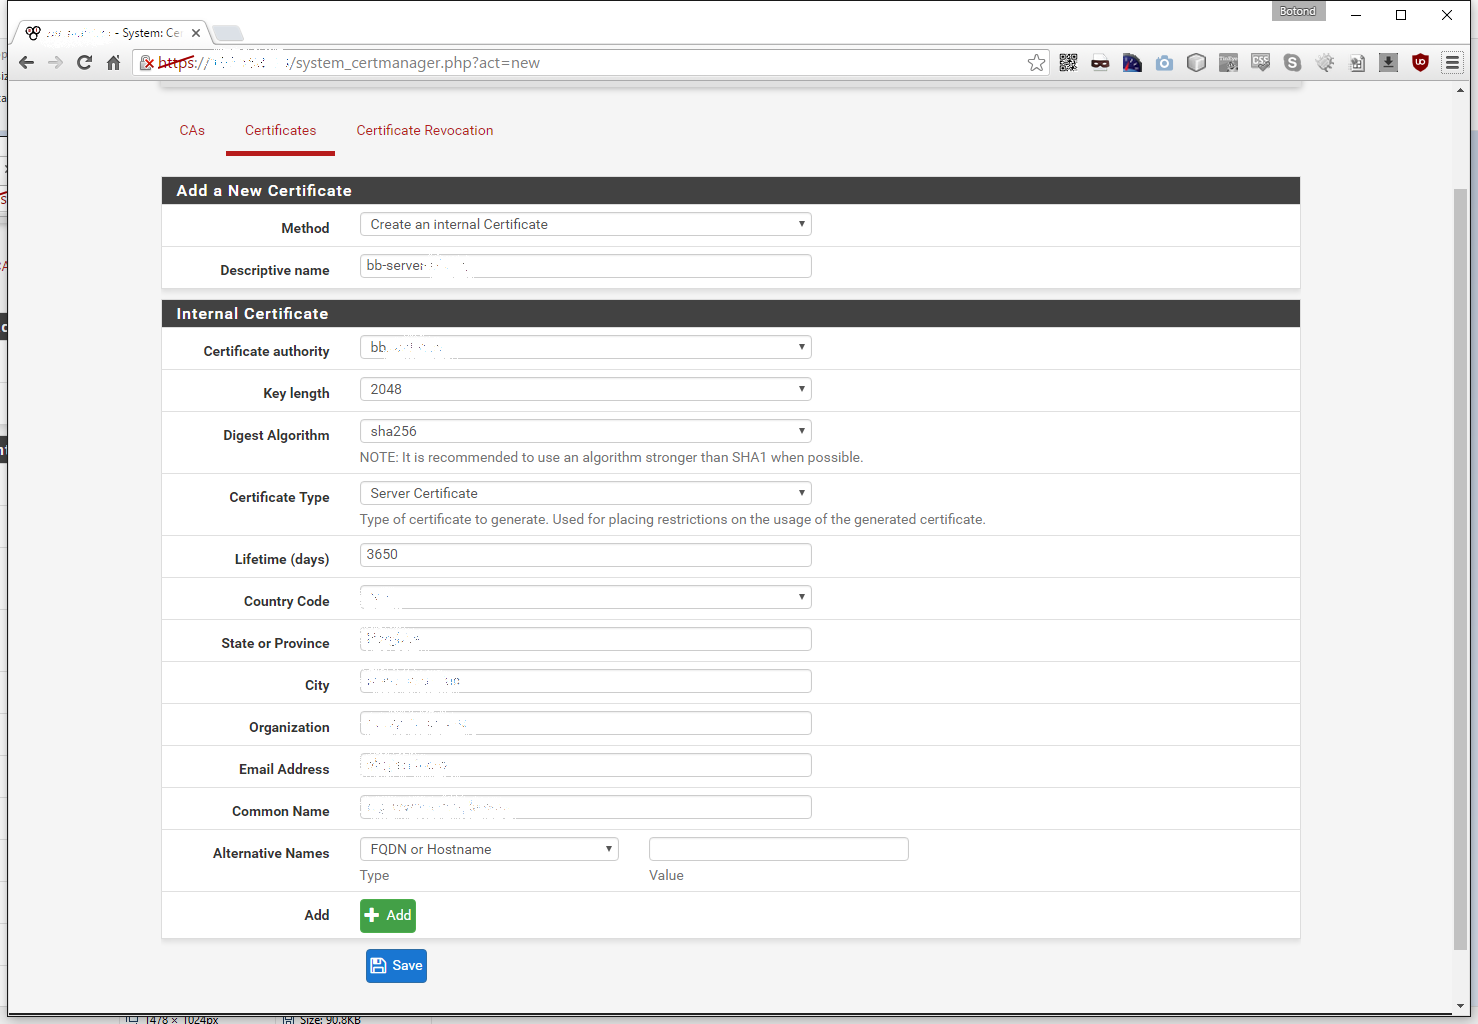
We don’t wan’t to import but rather create a new one, so let’s start by creating a server certificate. Give it a descriptive name, in my case it will be bb-server-SOMETHING, where SOMETHING is the remote locations name. Set the Digest to sha256, the type to Server Certificate and fill in the rest of the required fields as applicable:
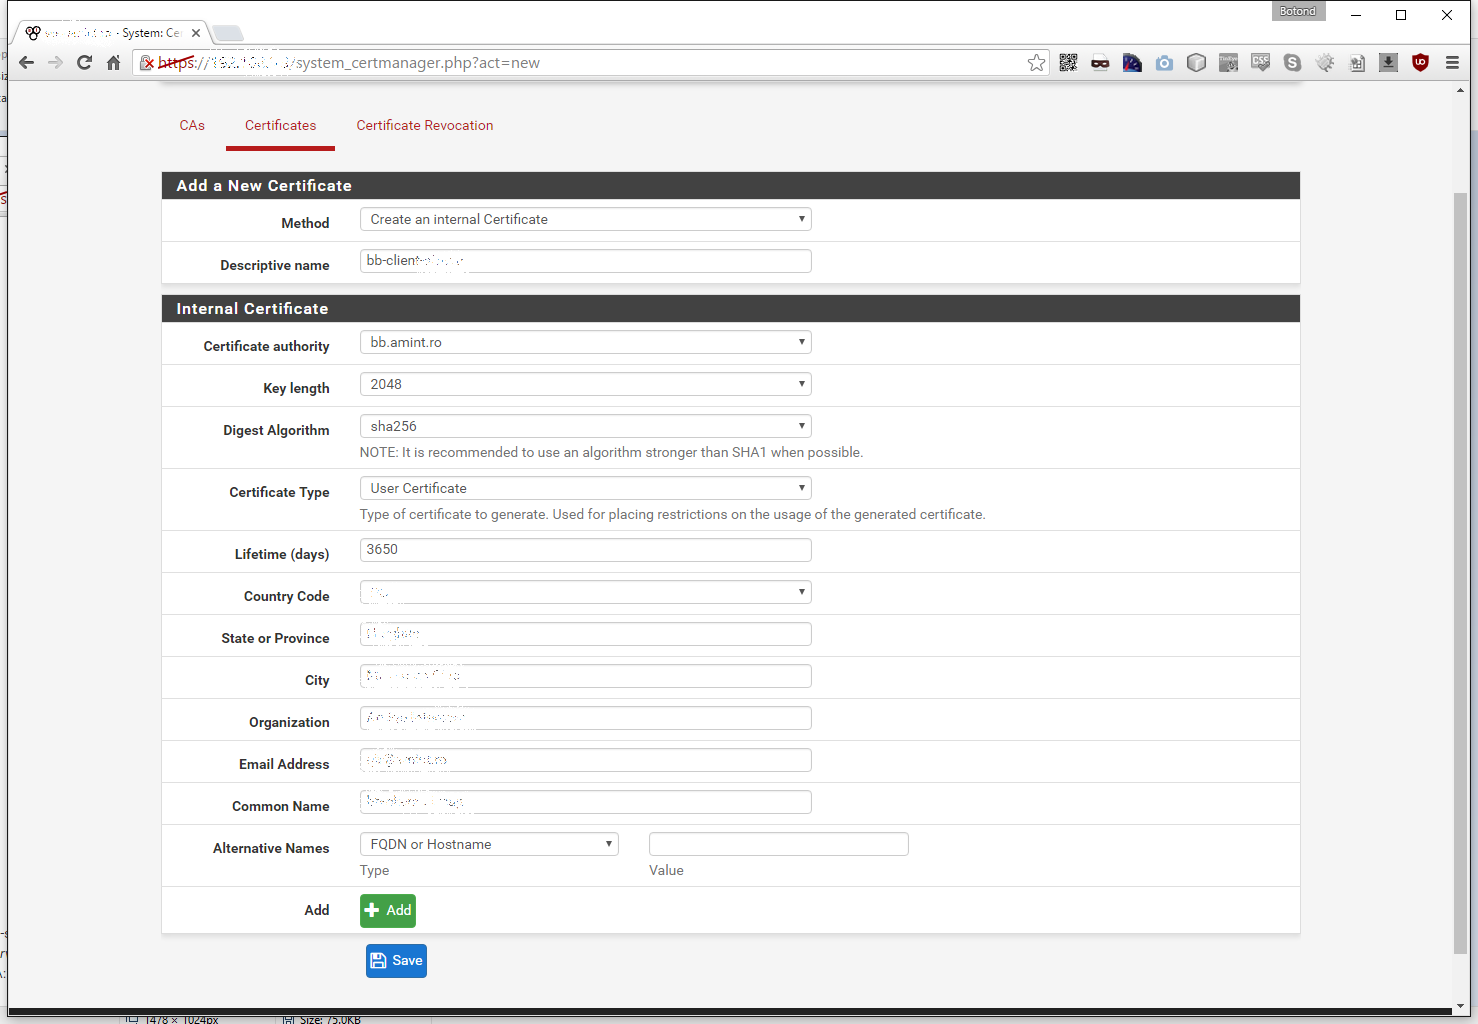
Now let’s add another one but here we will set the descriptive name to bb-client-SOMETHING and the certificate type to User Certificate, the digest remains sha256:
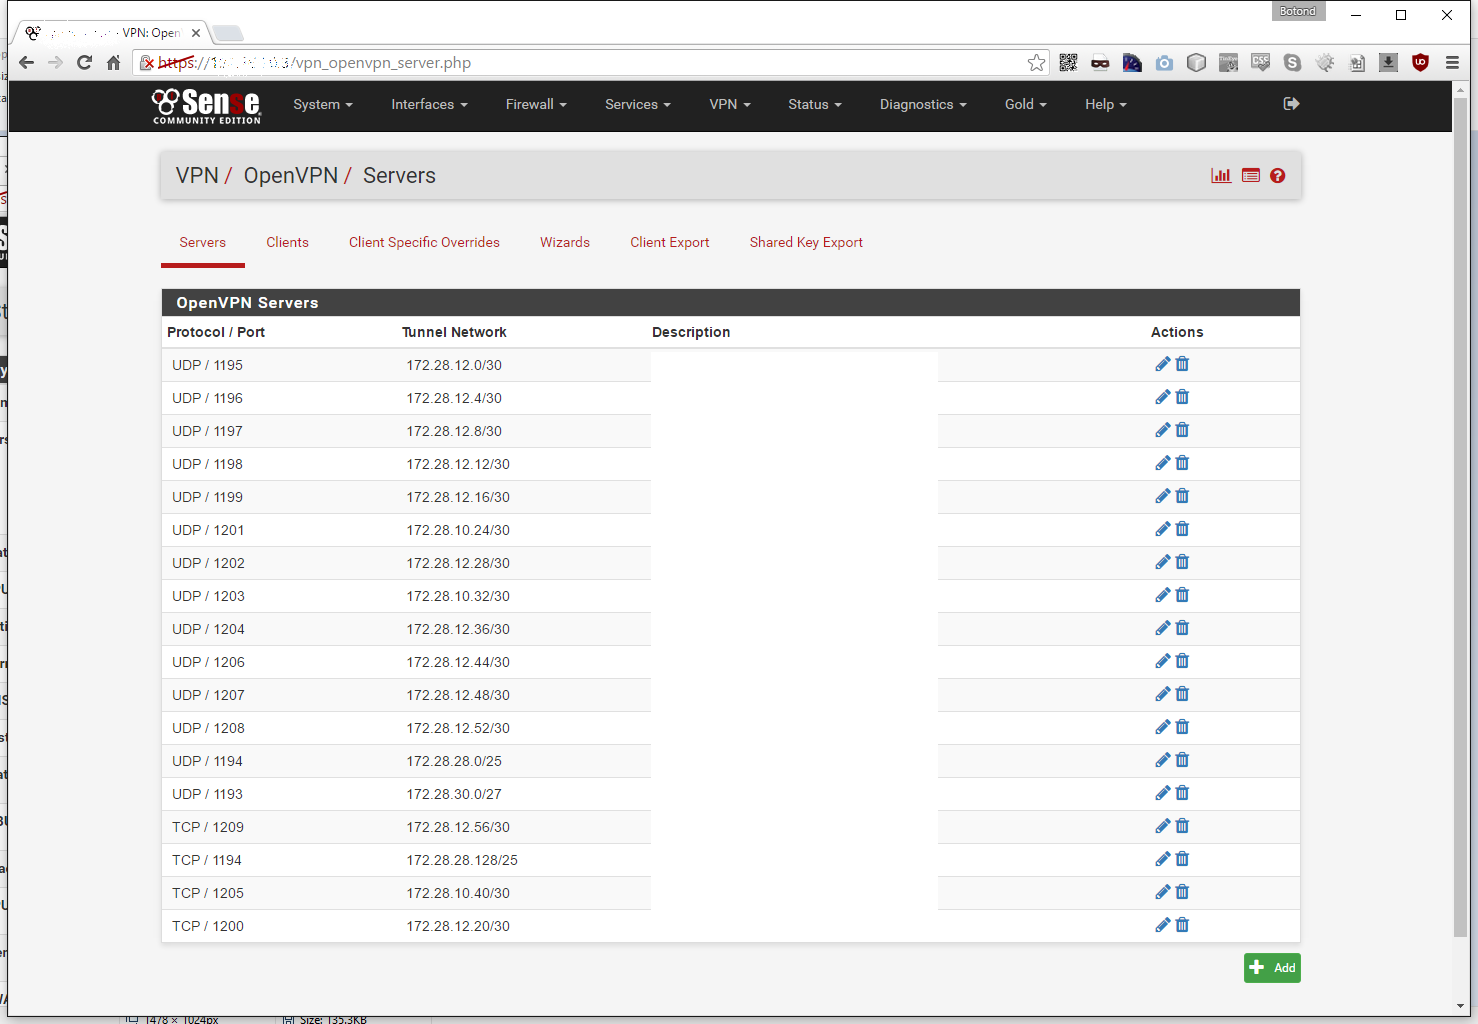
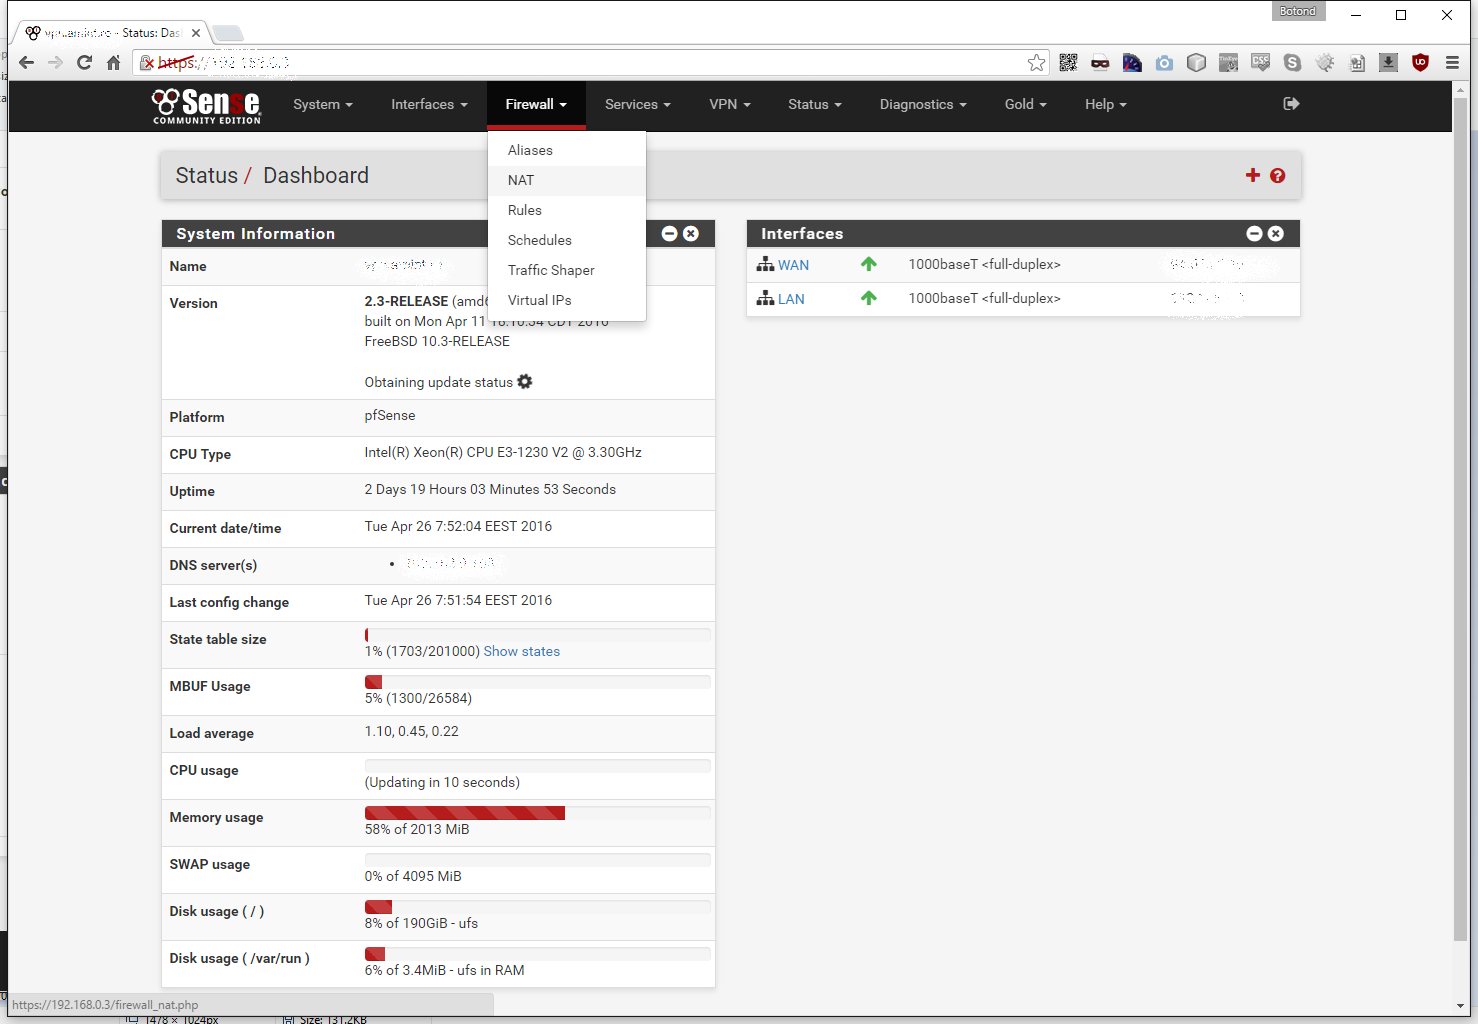
Now that we have our certificates we are ready to create our VPN server. Go to VPN -> OpenVPN:
 Stay on the Servers tab, cause we want to create a server. Scroll to the bottom of the page and click the green Add button:
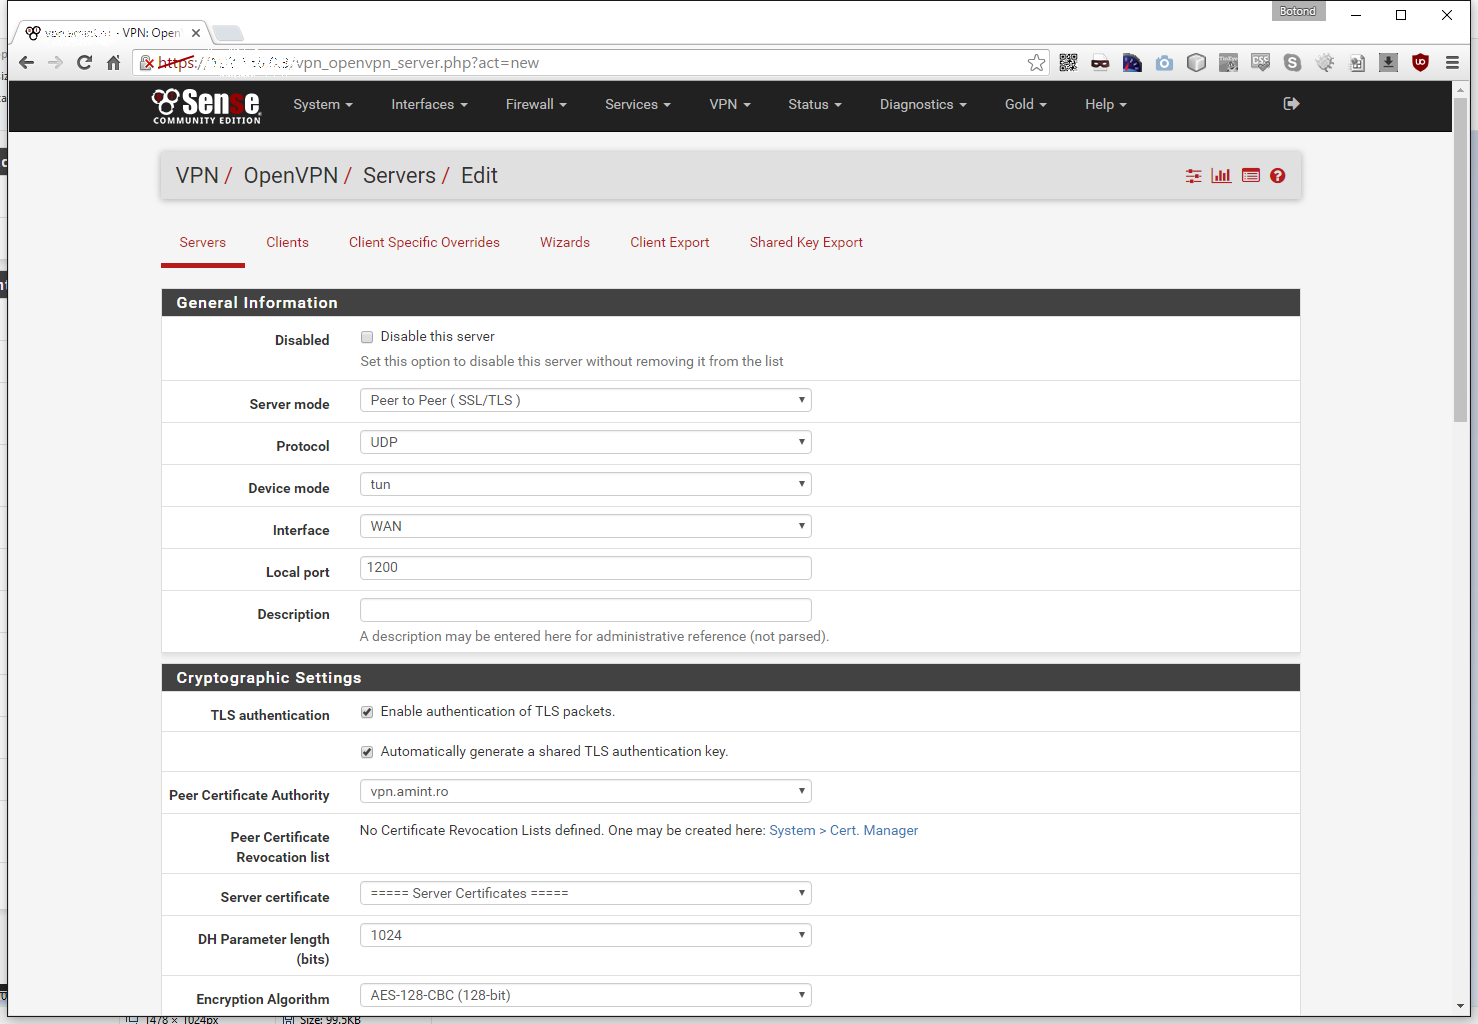
 The OpenVPN server creation screen will appear:
 Let’s change some of its settings. RouterOS (as of now) doesn’t support some OpenVPN features, so we need to adjust our server to be compatible with it.If this changes (hopefully in RouterOS 7) I will update the blog accordingly.
General Information
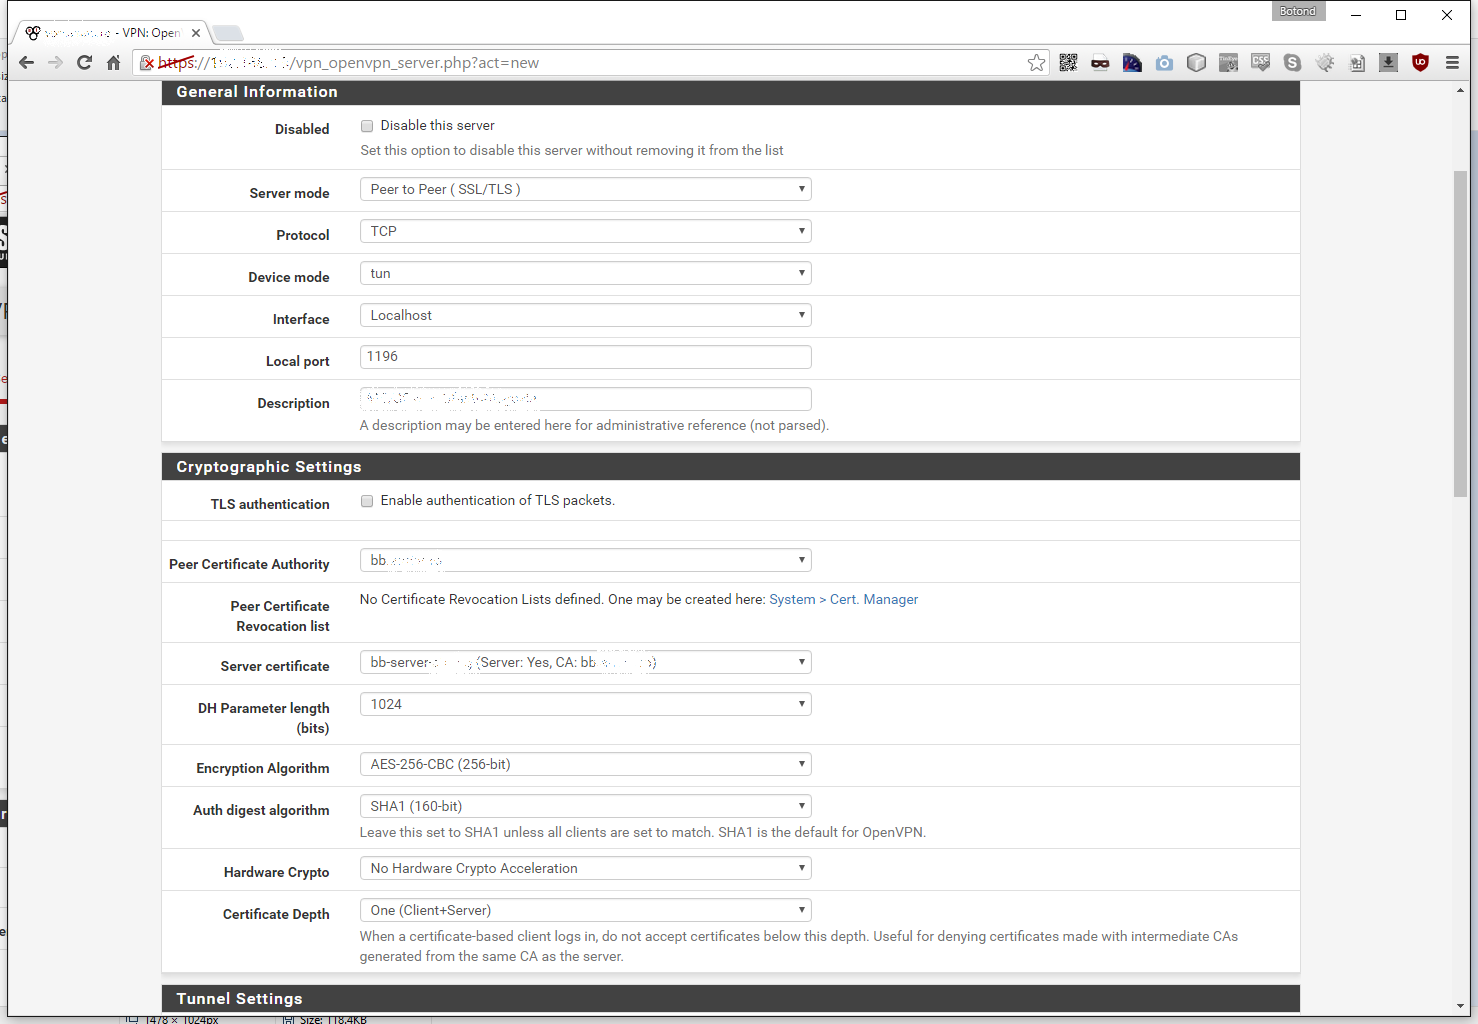
Let’s leave the Server mode on Peer to Peer (SSL/TLS) cause we want to do site-to-site. We need to change the Protocol to TCP, the Device mode is good as it is on tun. I prefer to set the Interface to Localhost, cause if there are more interfaces on the server or more than one external IP I will have more control over it later in the Firewall -> NAT section. I usually let the Local port auto increment as pfSense want’s it, but in this case I set it to 1196. Please note that the default port for OpenVPN is 1194, I usually reserve that for Remote Access type of servers (for the Road Warrior users). Let’s give it a nice Description so that later we can identify it.
Cryptographic Settings
Under TLS authentication we need to DISABLE Enable authentication of TLS packets. Change the Peer Certificate Authority to the one that contains our keys and set the Server certificate to the one we created earlier. Everything else you can leave at it’s default values, but I prefer to use AES-256-CBC instead of the default AES-128-CBC.
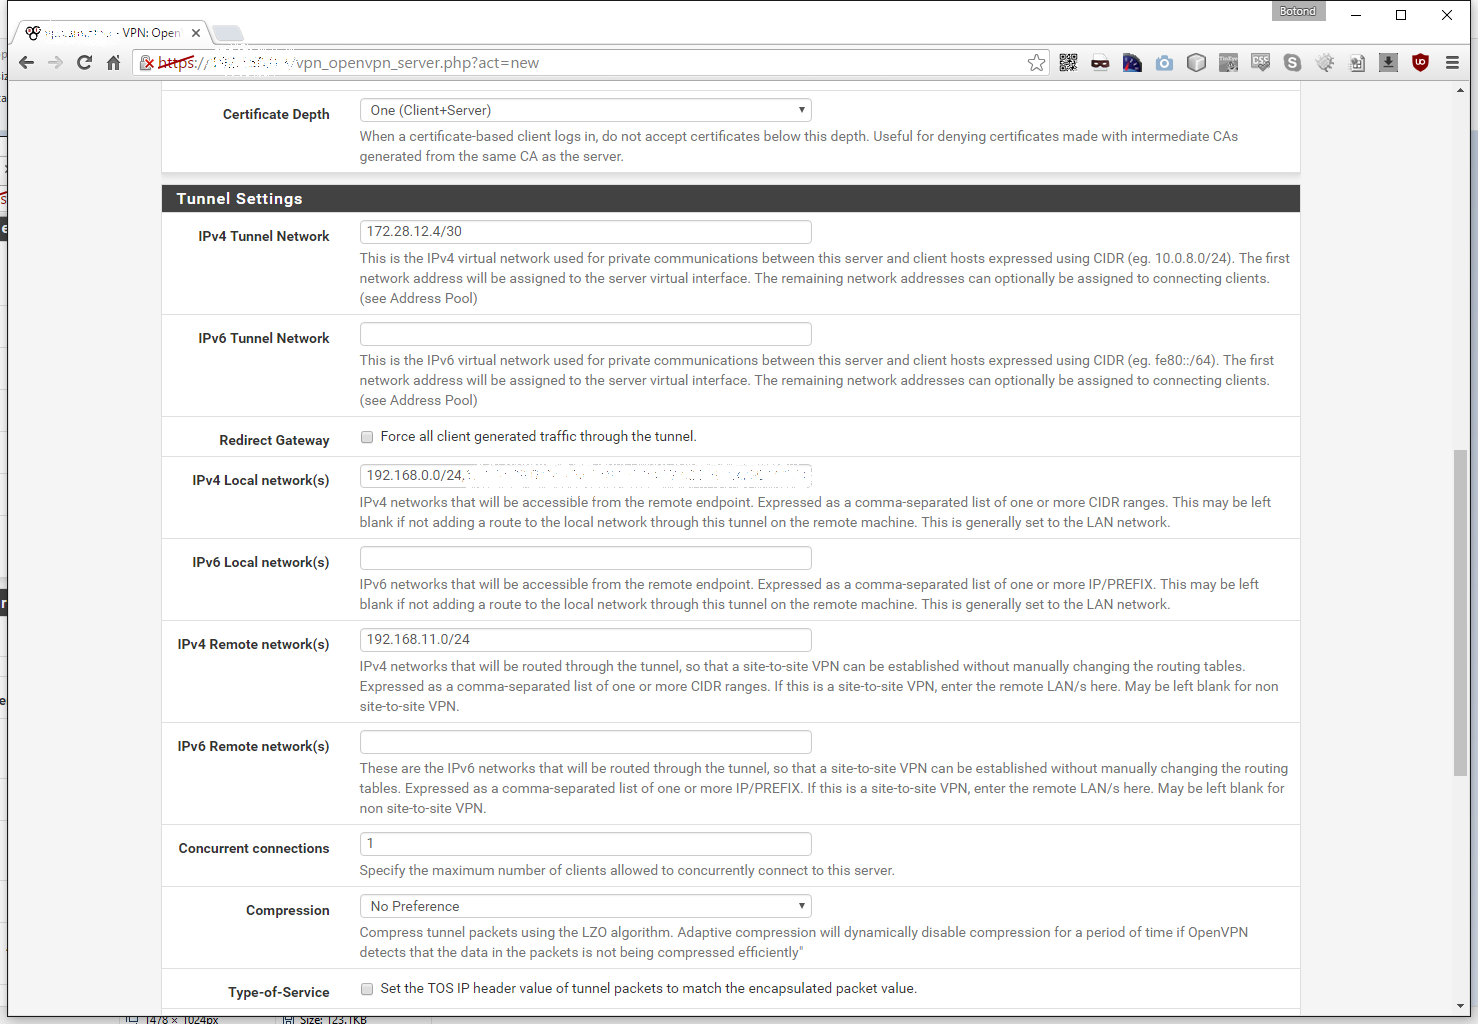
 Tunnel Settings
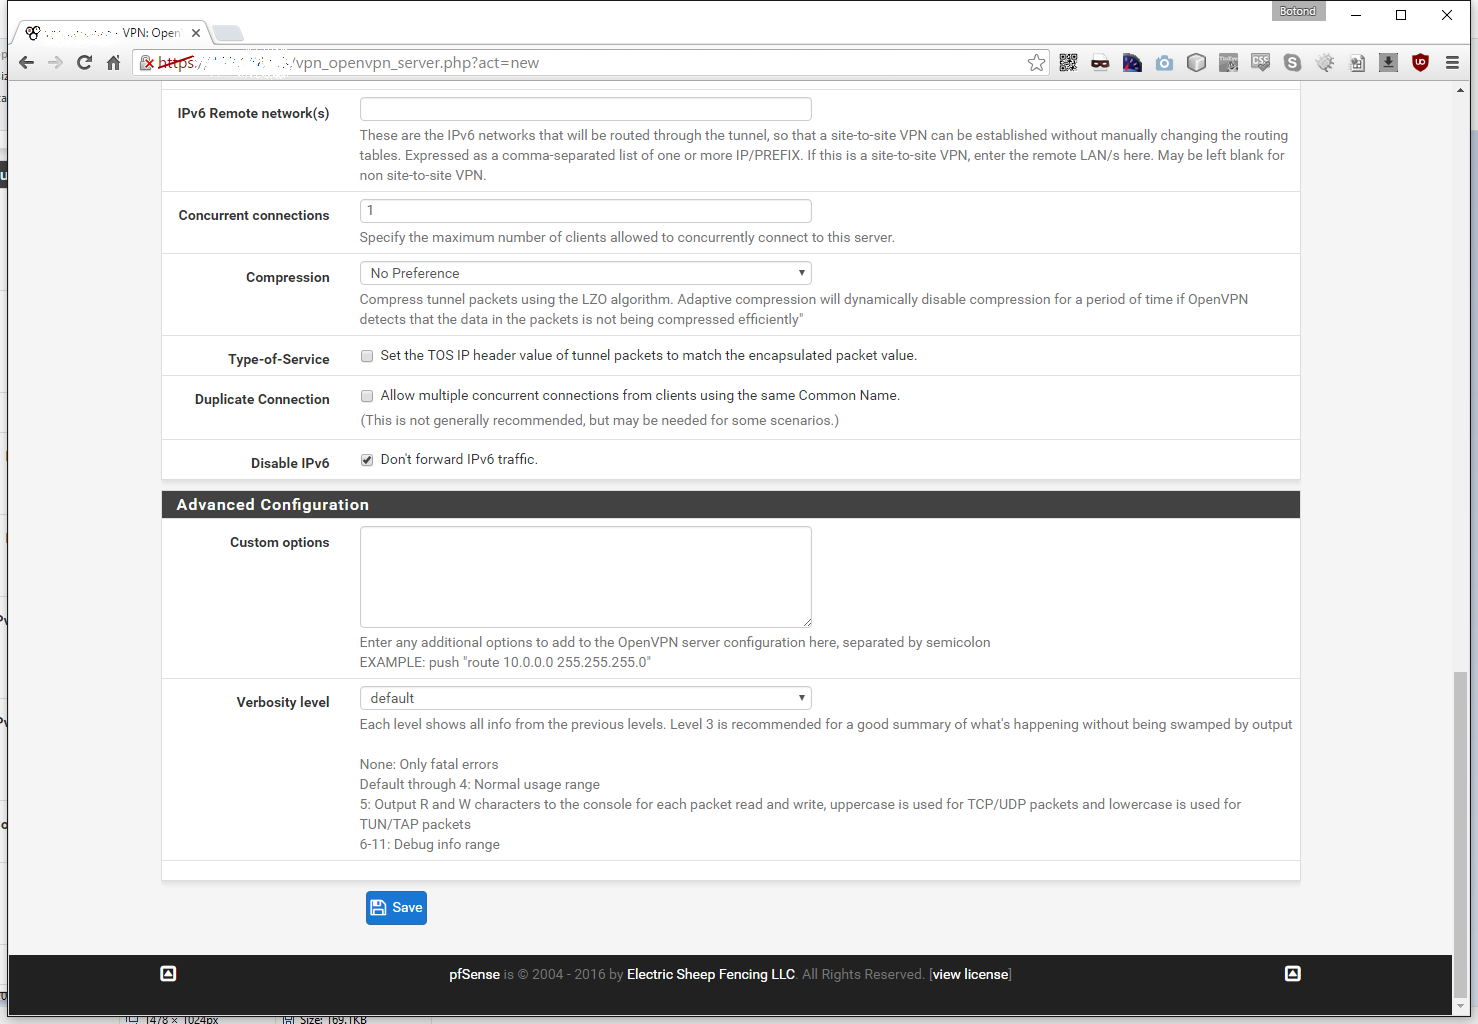
Let’s set the IPv4 Tunnel Network to something sensible, that no one uses. Any type of internal network is fine, but I prefer to use networks from the B class for my VPNing needs. In this example the network is 172.28.12.4/30. Make sure to use a /30 netmask, since we are connecting only two IPs together. Leave IPv6 Tunnel Network empty and Redirect Gateway unchecked. Under IPv4 Local netowork(s) we need to input the local (server’s) CIDR, in my case it is 192.168.0.0/24 and under IPv4 Remote network(s) the remote (client’s) CIDR, that would be 192.168.11.0/24 for me. I leave both IPv6 Local network(s) and IPv6 Remote network(s) empty, since we are only working with IPv4 here. We can safely set the Concurrent connections to 1, for obvious reasons. Leave Compression on No Preference, cause RouterOS 6 doesn’t support LZO compression, but if you disable it it won’t work either (maybe a bug?). Lastly I check Disable IPv6.
 Advanced Configuration
Let’s leave this section as is, if you know what you are doing and need to do additional OpenVPN options than this article clearly isn’t for you.
Now lets make NAT rule to allow our VPN server to be reachable from the outside. Go to Firewall -> NAT
 Scroll to the bottom of the page and click Add, the following screen will appear:
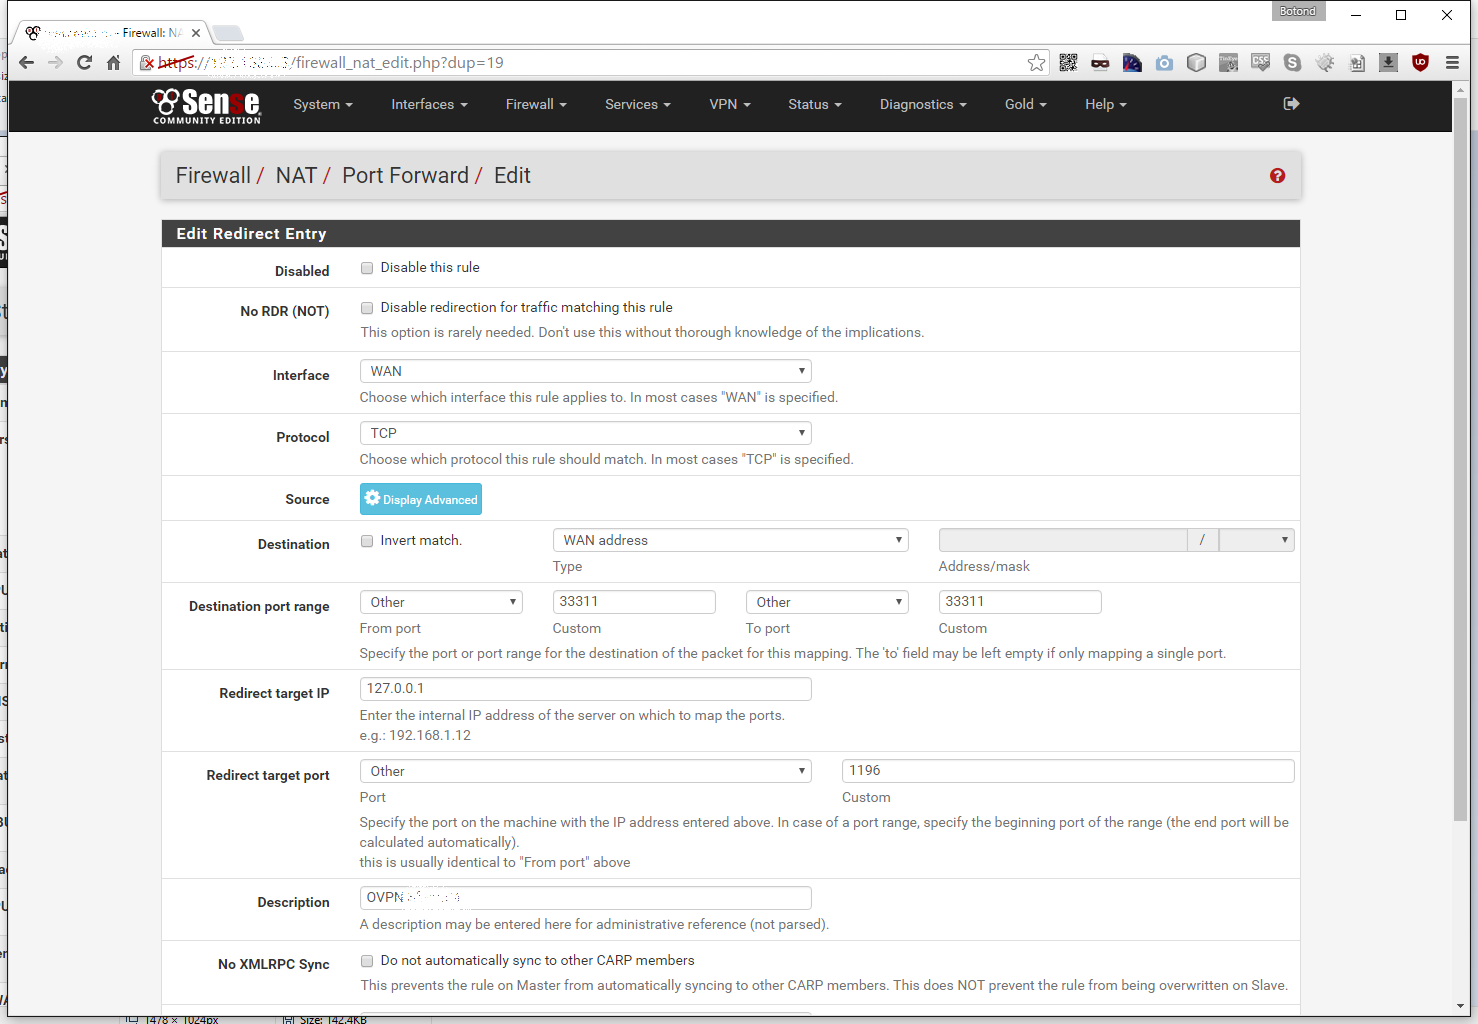
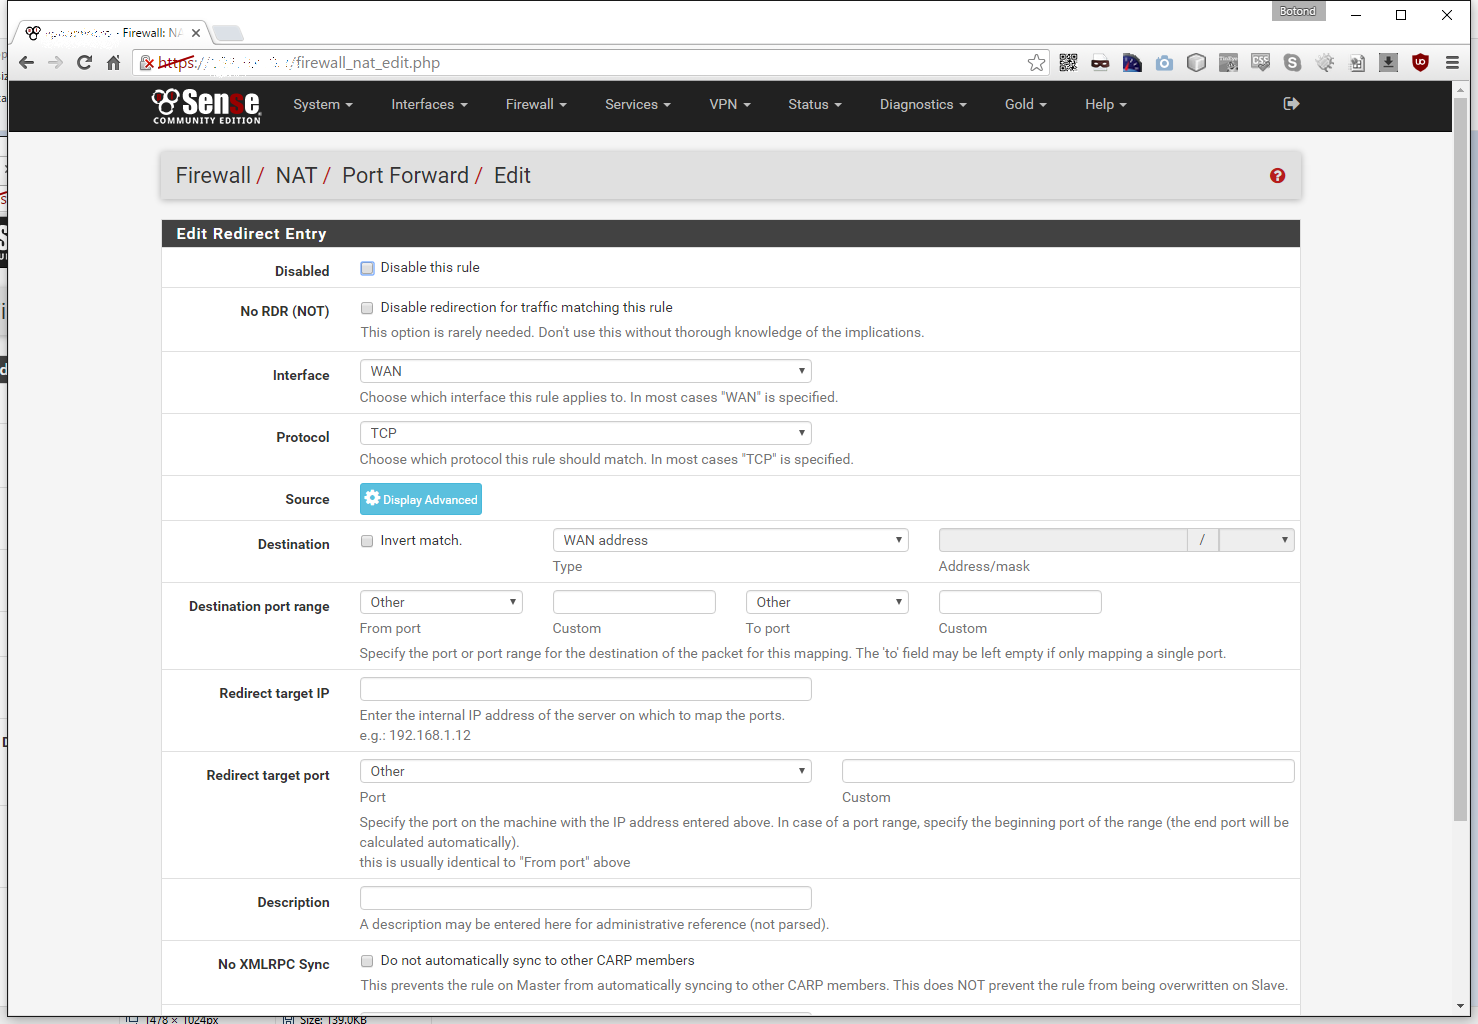 We leave the Interface on WAN, the Protocol on TCP, the Destination on WAN address, in the Destination port range field we input 33311 (in my case, but it can be anything you want to use, for example it could be 1196 to match the target port). For the Redirect target IP we enter 127.0.0.1 and we set Redirect target port to 1196 (the port and address our OpenVPN server listens on). Finally we give it a proper Description and click Save:
Now we are ready to set up the VPN on the client side, but first let’s export the certificates. Go to System -> Cert. Manager:
Let’s export the CA’s Certificate by pressing the dot/star button next to the CA that we used:
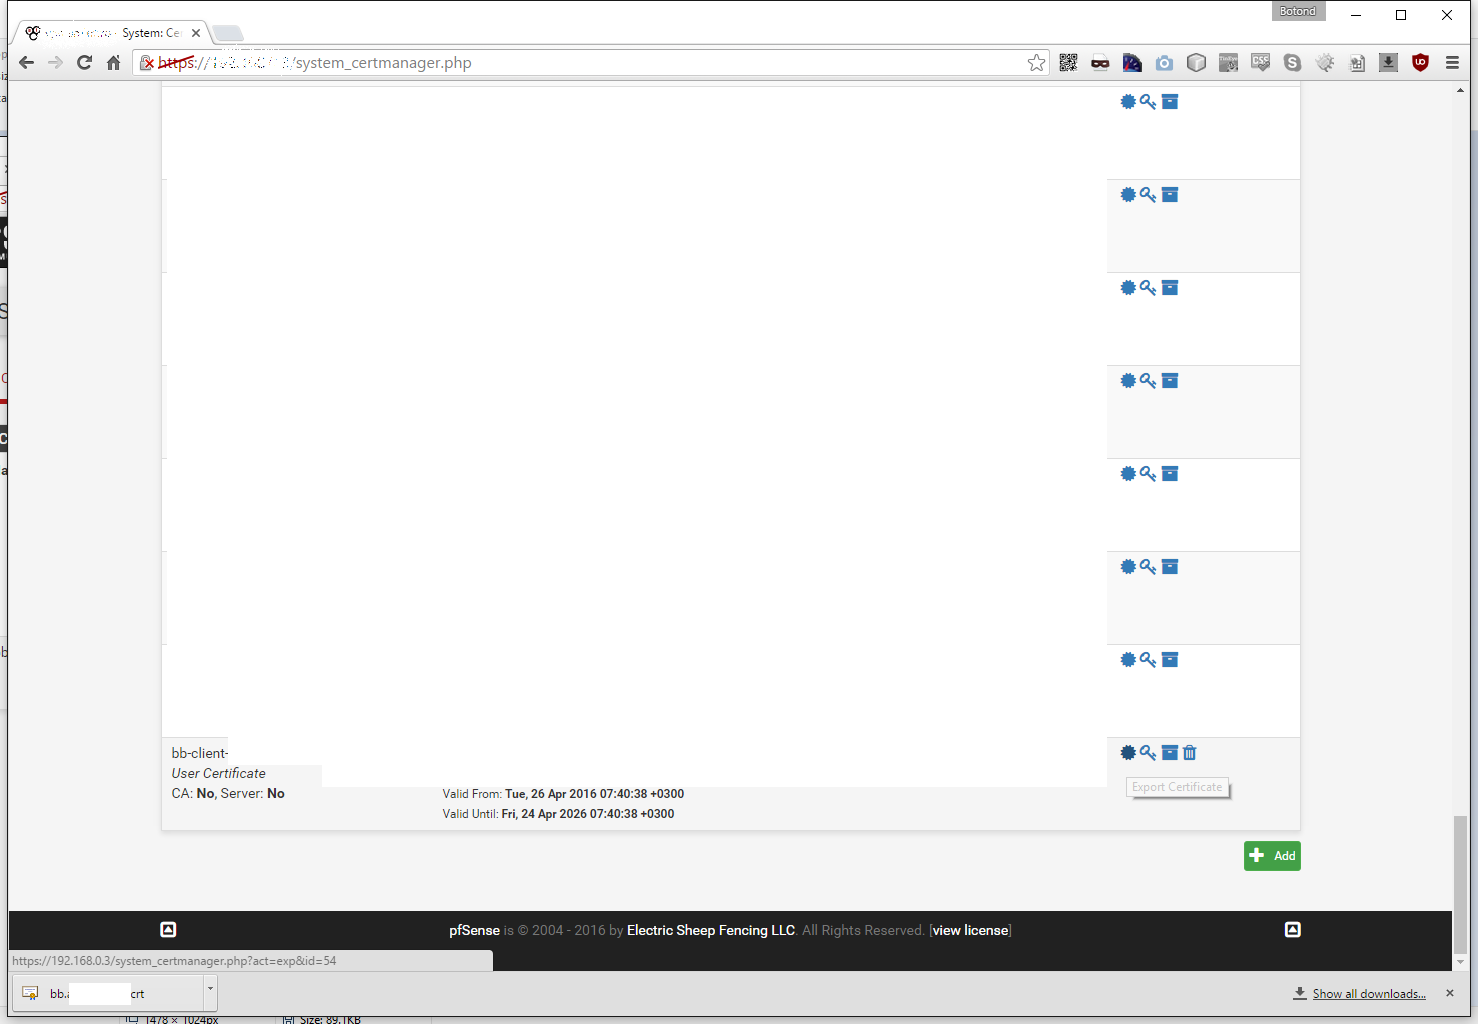
Now on the Certificates tab let’s export the client certificate that we created by pressing dot/star button next to it:
And also the client key for that certificate by pressing the key button next to it:
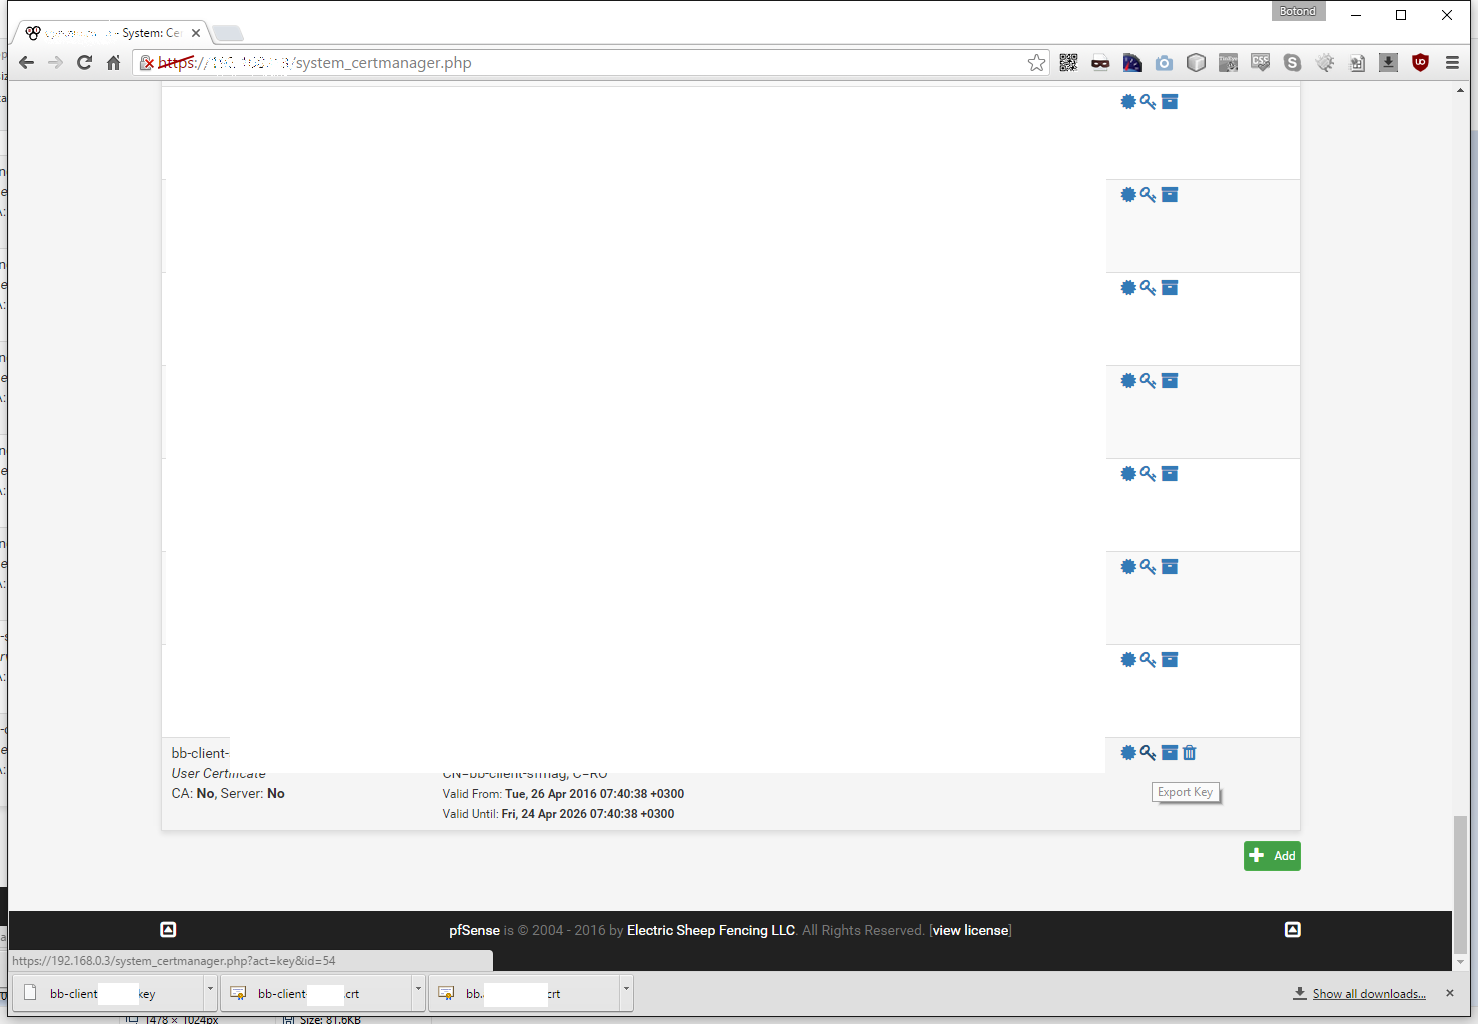
You should have 3 files:
- CA cert (here: bb.crt)
- client cert (here: bb-client.crt)
- client key (here: bb-client.key)

Let’s upload those files to our Mikrotik device. You can just simply drag and drop the 3 files from explorer directly into winbox. It will upload it and the File List window will popup showing where it was stored:
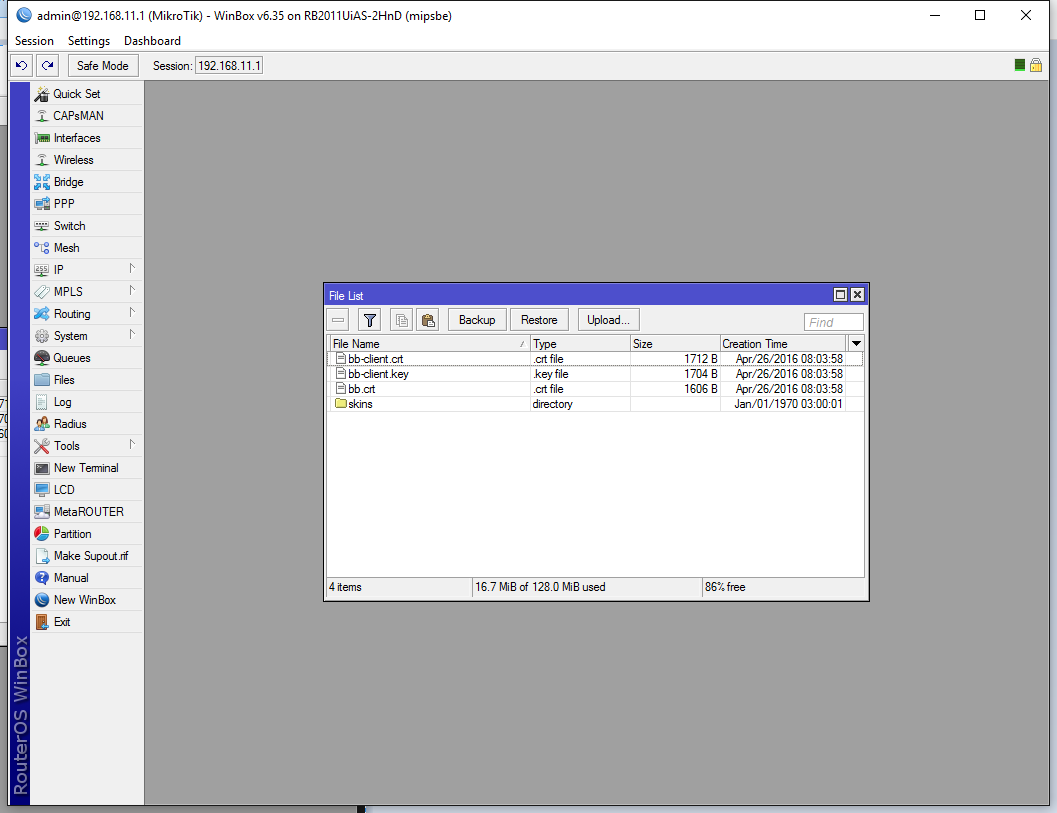
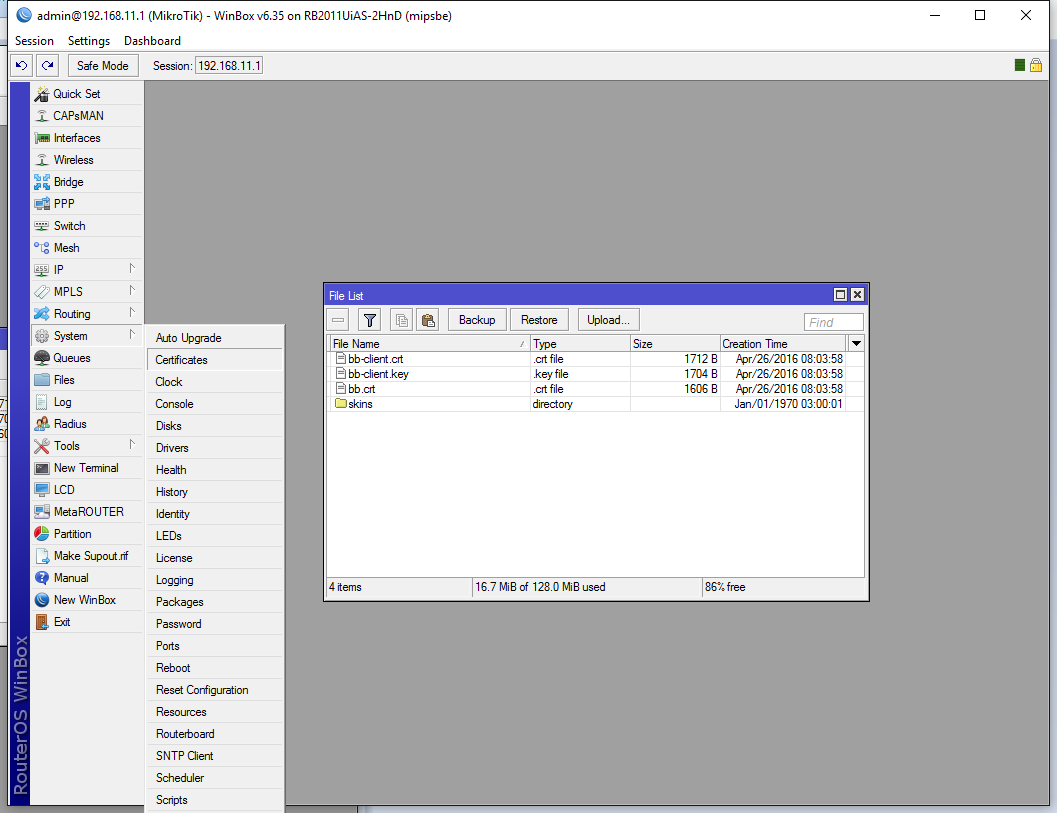
First let’s install our certificates. Go to System -> Certificates:
The certificates window will pop up:
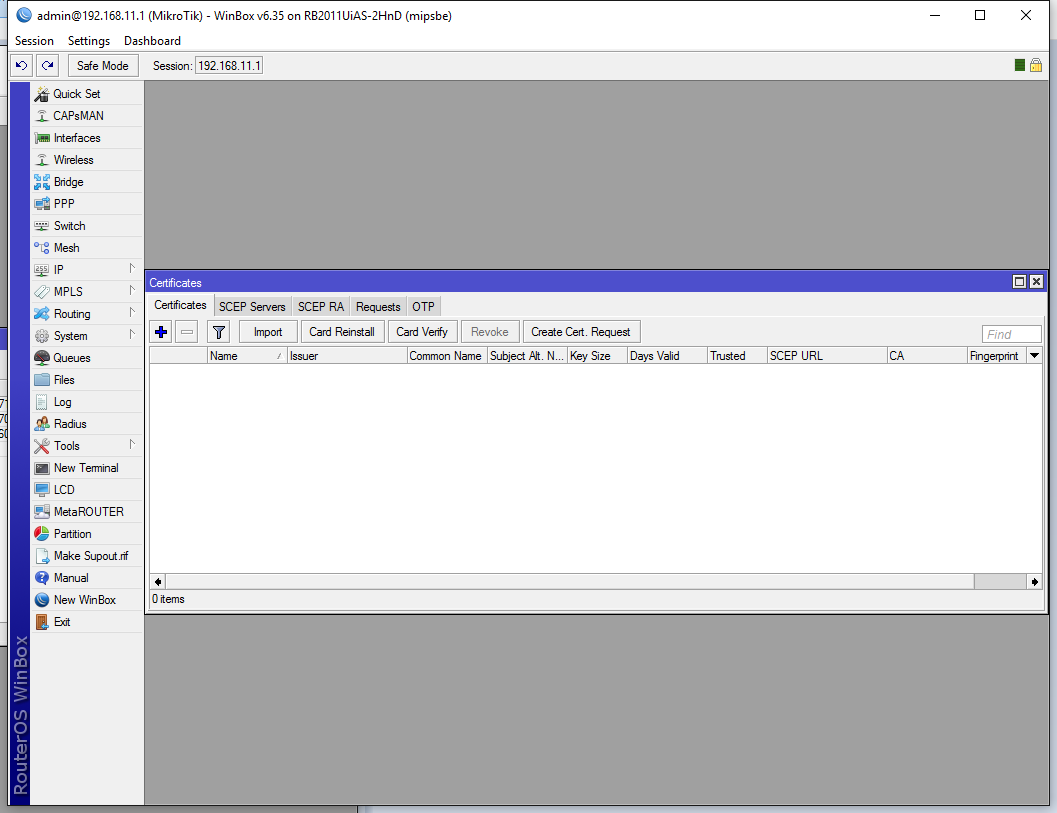
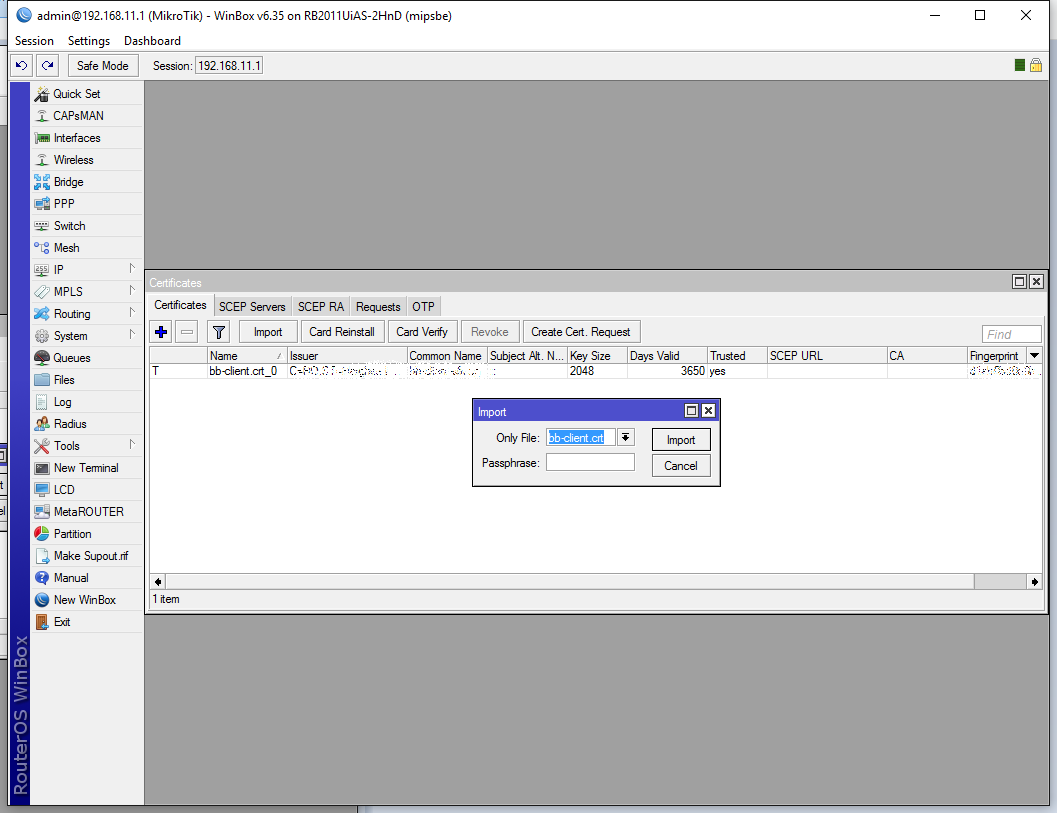
Click on the Import button:
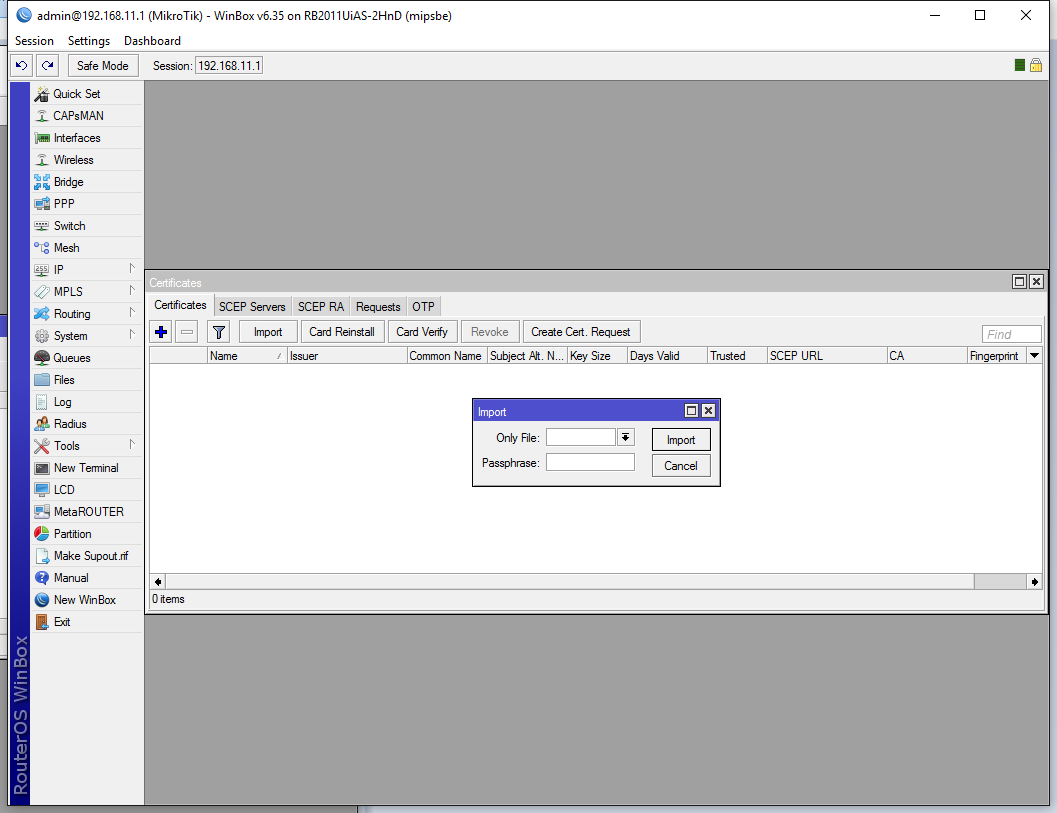
Select your client certificate from the drop down list, don’t enter a password and hit Import:

Now click Import a second time, to import the key as well. Notice that the certificate is imported (under the Import window):
After you added the key to the certificate it will show you KT instead of just a T. That means that you successfully added the key as well:

And finally using the Import button let’s add our CA cert as well:
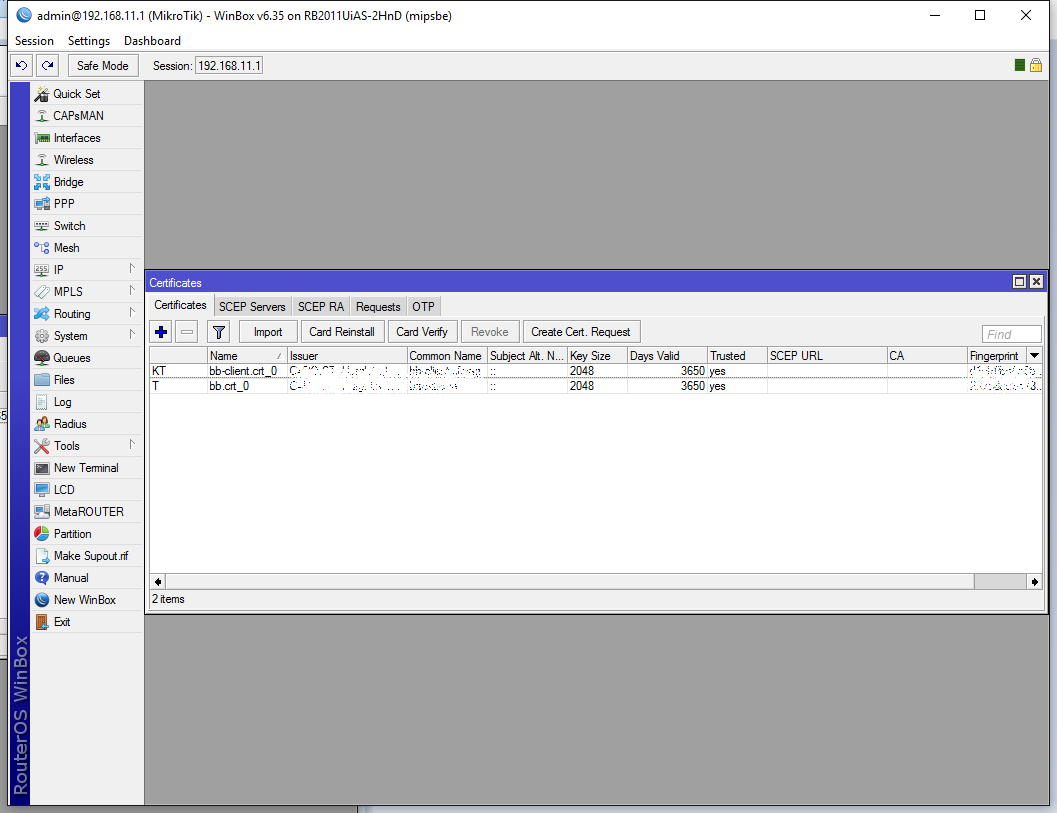
The certificates are properly installed, let’s close the window and go to PPP on the left side menu:

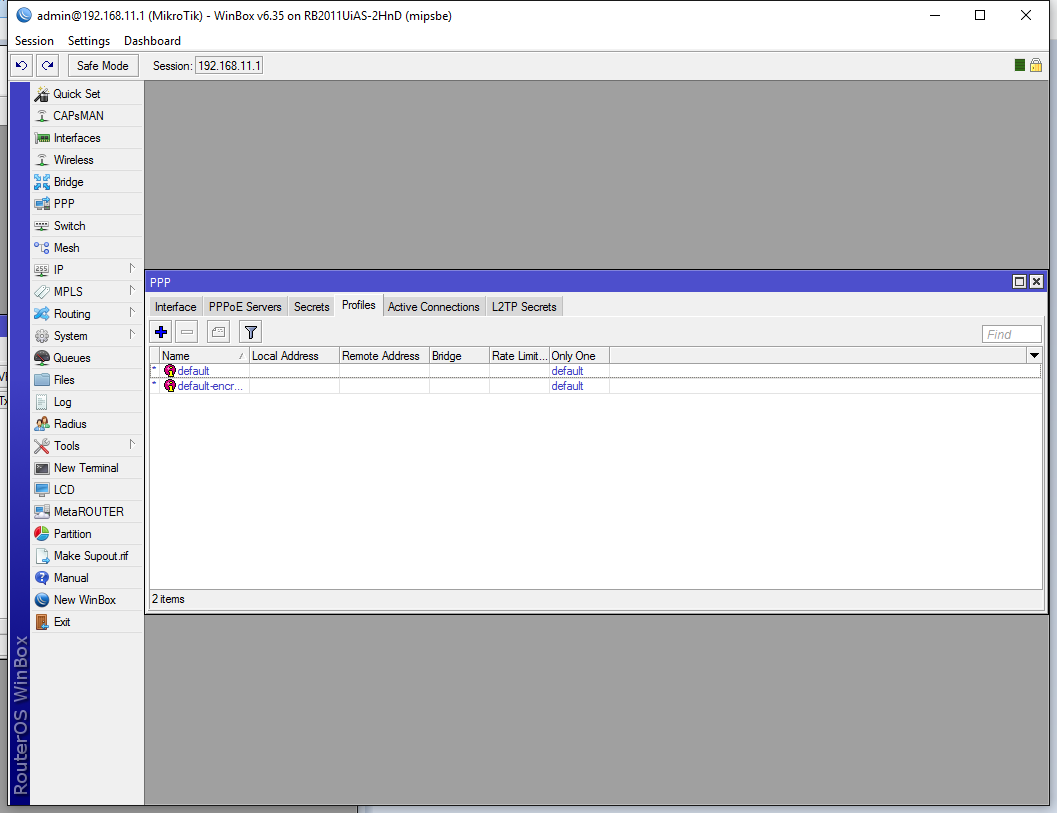
The PPP window will appear, defaulting to the Interface tab:

First let’s go and create a profile for our PPP interface on the Profiles tab:
Click the + button to add a new one and enter the Local Address and Remote Address. This should be the first usable address in your network for the remote address and the second for the local address. (Remember this is the client, it’s inverted here). In my case I input 172.28.12.6 for Local and 172.28.12.5 for Remote. Don’t forget to give it a proper Name:

After we hit OK it should look somewhat similar to this:

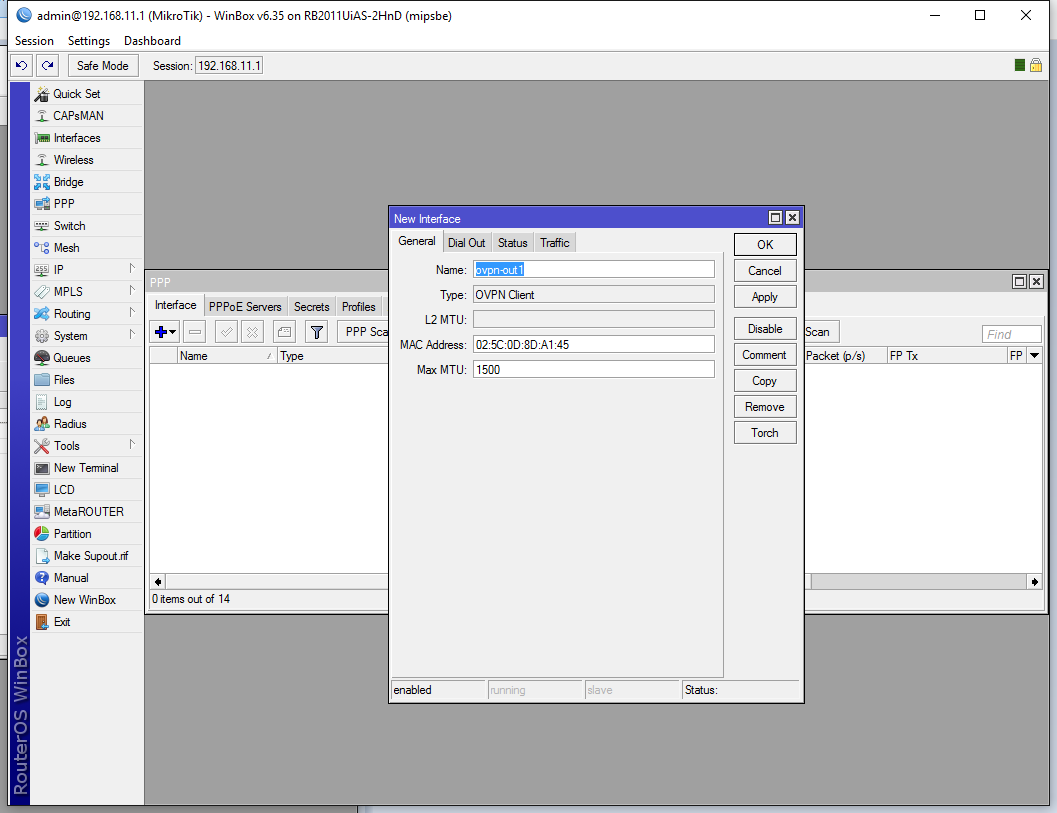
Now let’s go back to the Inferface tab and click on the + button to add a new interface. There will be a drop down menu (that I could not screenshot) with a lot of different type of PPP interfaces, but we will be using OpenVPN and in client mode, so click OVPN Client. The new interface dialog will appear. Under the General tab leave everything on default, but give it a proper Name:
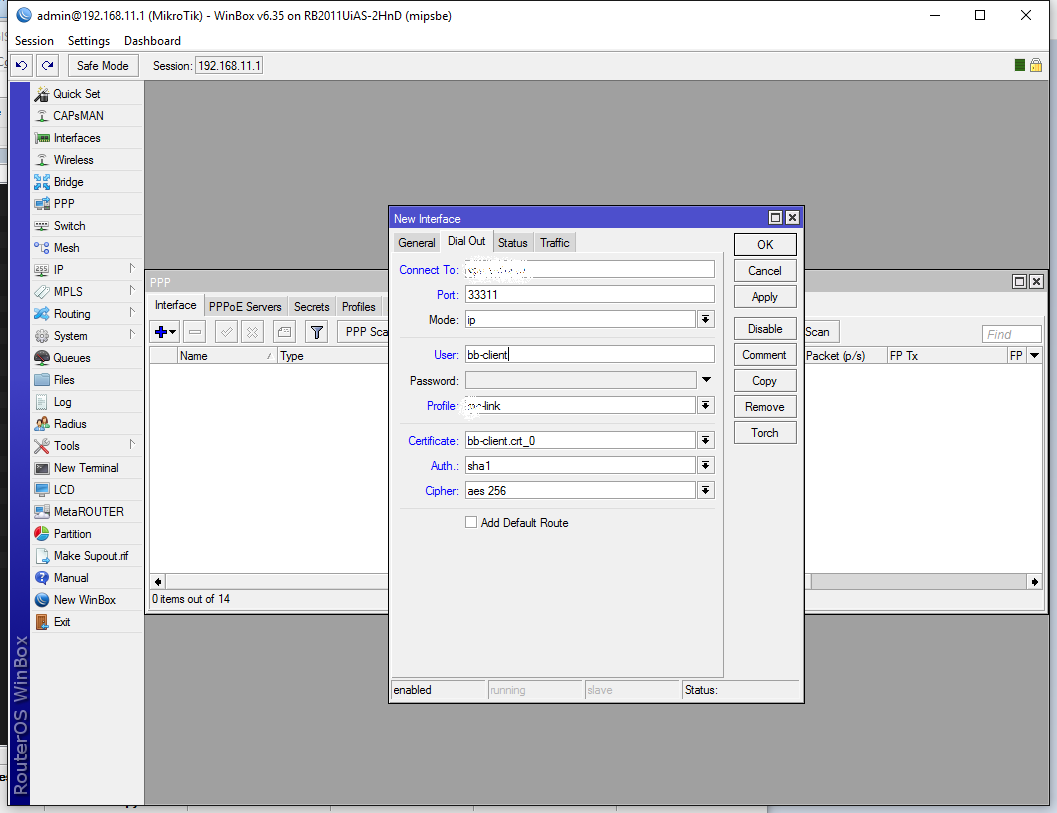
Under the Dial Out tab we need to enter the external IP address or host name of our server (redacted in the below screenshot) in the Connect To field, the external Port that we set (in my case 33311), leave the Mode on IP, enter any random Username (I usually like to enter my certificates name here). Leave the Password field unused and select the Profile that we just created. Select the client (not the CA) certificate in the Certificate field, leave Auth on sha1, but change the Ciper to aes 256 to match our servers configuration After all that is set up hit OK:
This is our VPN interface:

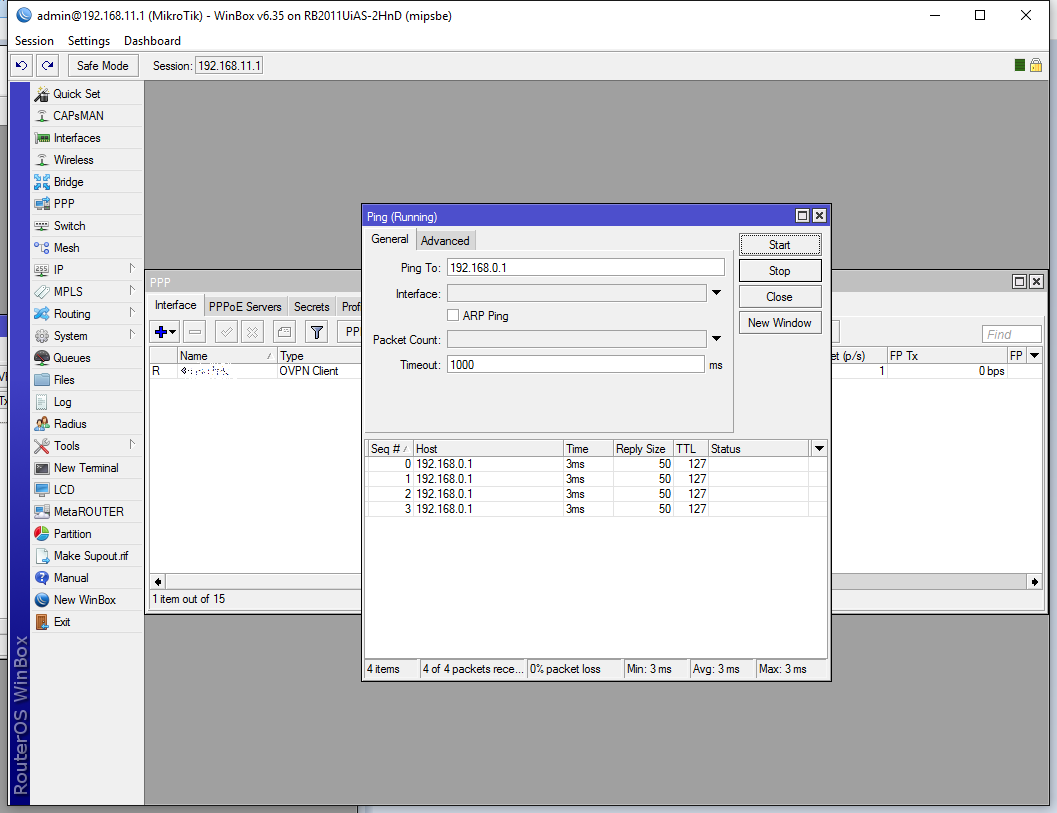
Now to test it out. I just did some pings (Tools -> Ping) to the remote site:
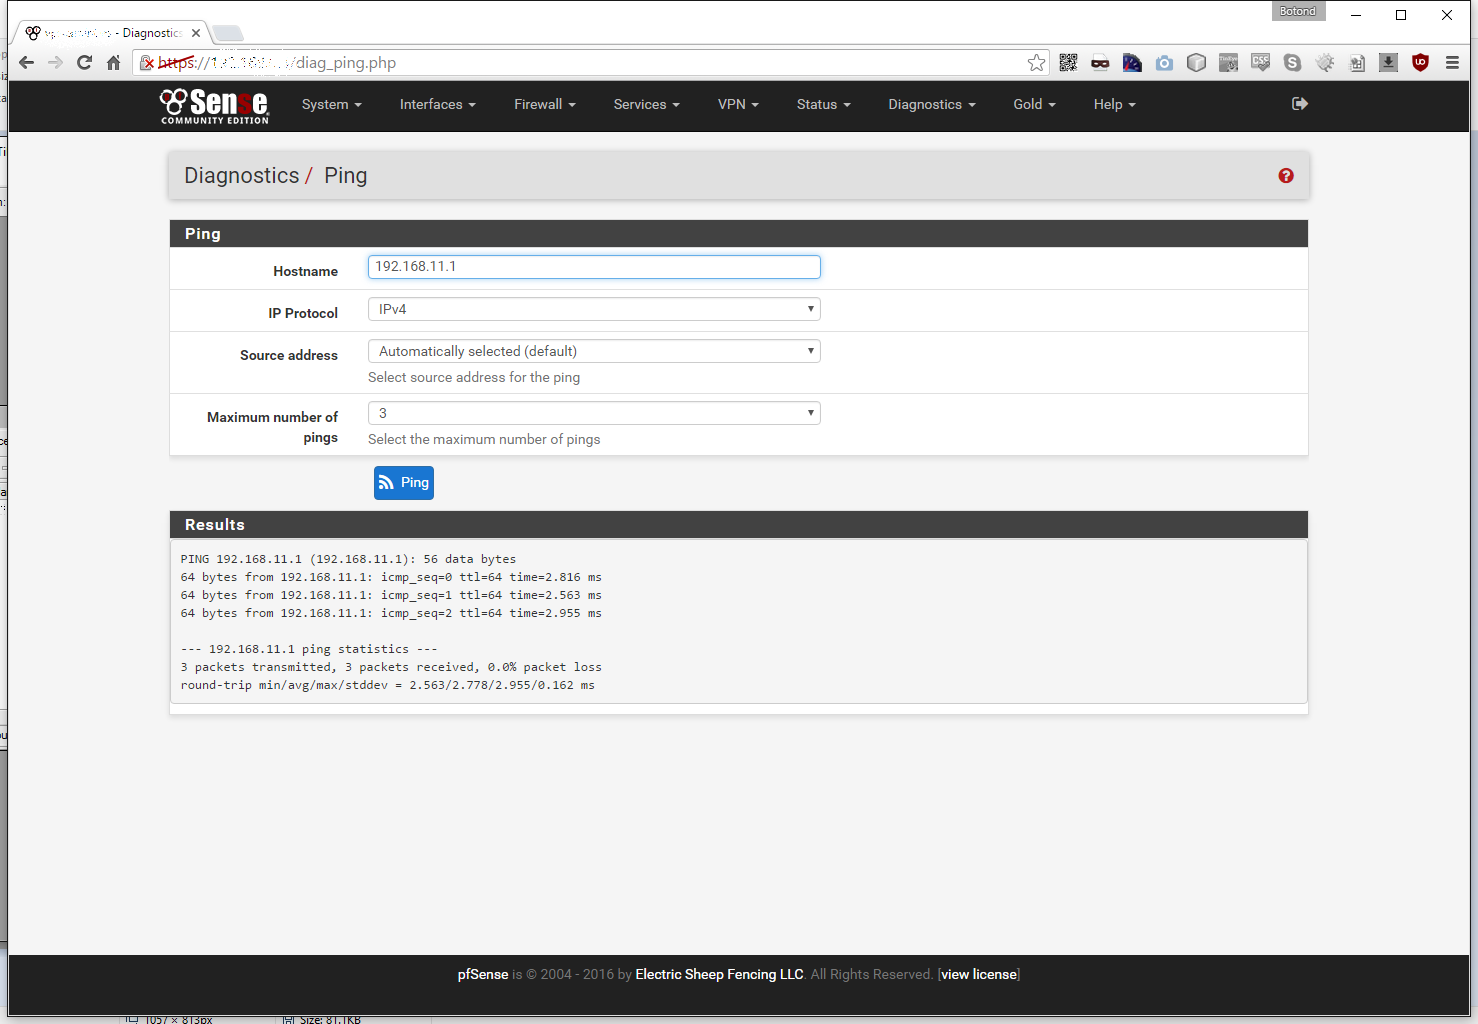
And the same on the server side:
That’s pretty much it. Enjoy your VPN! You also might want to read my OpenVPN performance of Mikrotik devices article where I tested a wide range of routers to find out which router might fit your needs.
don’t forget to turn on and add second nat masquerading rule in mikrotik otherwise it did not work for me
thank you for the great tutor..
i have some problem, i’m using 2 wan with 2 ISP, and have different gateway each ISP.
how to create 2 openvpn.. with 1st openvpn server on 1st ISP, and the 2nd one using 2nd ISP.
my concern is to separate the simultaneous vpn connection..
need your advice sir..
thank you very much
what devices do you have and how are they connected?
Hi, I have followed your manual and I want to thank you because it worked perfectly. I only have one small problem, and is that the transmission speed between one and another part of the tunnel is about 7 Mbs. Considering that we have 300 Mbs symmetric fiber at both ends, I think it’s a very low value. Any idea what might be going on? Thank you very much again!
Hello qlr
Could you provide NAT table from both sides, i think is nessesery to set up outbound NAT on mikrotik and on PFsense.
Hi.
If you configured pfSense & Mikrotik exactly like described, you don’t need to configure NAT.
If you have a last “deny all” rule on Mikrotik firewall, you may need to add two firewall filter rules:
1. action=accept, chain=forward, in.interface=[openvpn-interface-name] for pfSense-to-Mikrotik traffic,
2. action=accept, chain=forward, out.interface=[openvpn-interface-name] for Mikrotik-to-pfSense traffic
Problems may also appear when you trying to use WAN interface instead of localhost on pfSense. I made a simple masquerade srcnat rule on Mikrotik device to reach pfSense’s side hosts, but I can’t find a way to configure pfSense’s firewall or NAT rules: remote network on Mikrotik side still unreachable.
Thank you man.
This is the best tutorial Ive seen about MKT.
But I have a question. I did all steps exactly as you teached.
The connection MKT–>Pfsesne is ok, but the connection Pfsense–>MKT doesn’t work.
Can you have some light to my mind?
I follow the steps buy not work, connect, but not pass traffic between the nets.
the tunnel ip es 10.10.10.0/24
pfsense has 10.10.10.1 and mikrotik 10.10.10.2
from mikrotik to 10.10.10.0 ping ok (local ip)
from pfsense to 10.10.10.1 ping ok (local ip)
from mikrotik ping to 10.10.10.1 does not work
from pfsense ping to 10.10.10.2 does not work
Whats wrong?
I have the same problem.
PfSense’s log:
Nov 22 16:08:02 openvpn 76674 Bad compression stub (swap) decompression header byte: 1
Nov 22 16:08:12 openvpn 76674 [levaromat.com] Inactivity timeout (–ping-restart), restarting
Nov 22 16:08:12 openvpn 76674 SIGUSR1[soft,ping-restart] received, process restarting
Nov 22 16:08:13 openvpn 76674 NOTE: the current –script-security setting may allow this configuration to call user-defined scripts
Nov 22 16:08:13 openvpn 76674 Preserving previous TUN/TAP instance: ovpns1
Nov 22 16:08:13 openvpn 76674 Listening for incoming TCP connection on [AF_INET]127.0.0.1:1194
Nov 22 16:08:14 openvpn 76674 TCP connection established with [AF_INET]178.215.1**.**8:41409
Nov 22 16:08:14 openvpn 76674 TCPv4_SERVER link local (bound): [AF_INET]127.0.0.1:1194
Nov 22 16:08:14 openvpn 76674 TCPv4_SERVER link remote: [AF_INET]178.215.1**.**8:41409
Nov 22 16:08:14 openvpn 76674 WARNING: ‘link-mtu’ is used inconsistently, local=’link-mtu 1560′, remote=’link-mtu 1559′
Nov 22 16:08:14 openvpn 76674 WARNING: ‘ifconfig’ is present in local config but missing in remote config, local=’ifconfig 172.10.10.1 172.10.10.2′
Nov 22 16:08:14 openvpn 76674 WARNING: ‘comp-lzo’ is present in local config but missing in remote config, local=’comp-lzo’
Nov 22 16:08:14 openvpn 76674 [levaromat.com] Peer Connection Initiated with [AF_INET]178.215.171.88:41409
Nov 22 16:08:15 openvpn 76674 Bad compression stub (swap) decompression header byte: 69
Nov 22 16:08:15 openvpn 76674 Initialization Sequence Completed
Nov 22 16:08:15 openvpn 76674 Bad compression stub (swap) decompression header byte: 1
I got error Bad LZO decompression header byte: 69
I should change compression option to comp-noadapt, and it start work.